
Author’s note: A detailed guide to using DeepSeek Harness’s Create mode: the workflow for generating plugins through conversation, three ways to access plugins, a prompt-writing formula, and a breakdown of the seven official demo prompts, with tips for refining them over multiple rounds.
DeepSeek recently introduced Create mode in Harness. It turns your ideas into plugins through conversation, and you can use each plugin directly in Harness as soon as it’s generated. The official demo video showcased seven plugins, including a design studio, a sandbox game, and a model visualization tool, and shared a collection of the prompts used in both Chinese and English. You can already try recreating this feature yourself.
This isn’t another high-level overview. To answer the question “How do you use DeepSeek Harness Create mode?”, we’ll break down the official prompts and look at how they describe entry points, interfaces, and features—and why some plugins take multiple rounds of conversation to get right.
What you’ll learn: By the end, you’ll understand the basic workflow for Create mode, how to choose an entry point for your plugin, and a reusable formula for writing prompts. You’ll be able to build Harness plugins tailored to your needs.
Key Takeaways: DeepSeek Harness Creation Mode
Before you dive in, it helps to understand what Creation Mode is designed to do. Put simply, it turns plugin development from a programming task into a conversation: you describe what you need, Harness generates it, and the result appears in the app as a plugin.
| Key point | Description | Benefit |
|---|---|---|
| Develop through conversation | Select “Creation Mode” in Harness and describe the plugin in natural language | Extend functionality without writing code |
| Generate and use | The generated plugin is added directly to the Harness interface | No need to package, install, or configure it |
| Choose where it appears | Place it in the left or right sidebar, or open it from a conversation | Put the plugin where it fits your workflow |
| Refine it over multiple rounds | If the first result isn’t quite right, keep chatting to make changes | Gradually shape complex plugins into what you need |
| Explore any use case | Official examples cover design, games, learning, reading, and analytics | Make Harness work the way you want |
Deep Dive: DeepSeek Harness Creation Mode
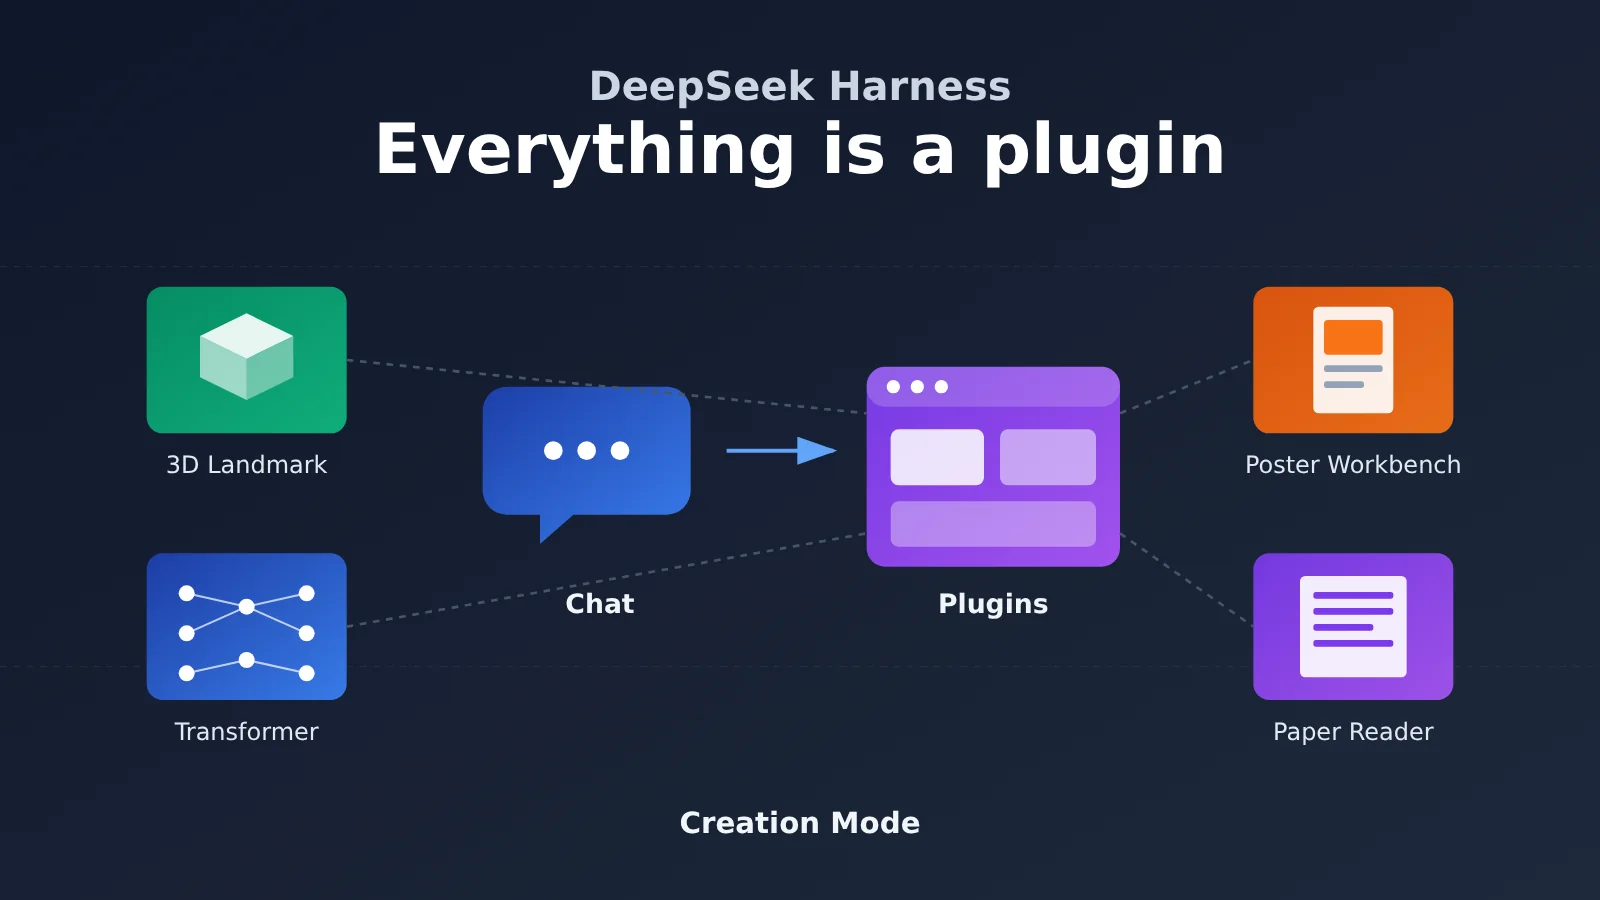
The first key idea is to think in terms of plugins. The official motto sums it up in one sentence: Everything is a plugin. Whether you’re creating a 3D exhibition, a video-editing suite, or a tool for customizing the interface, Creation Mode treats it as a plugin. That means you’re not just “getting a piece of code” in a chat window—you’re getting an interactive feature that becomes part of Harness itself.
The second key idea is to specify where the plugin appears. Take a close look at the seven official prompts, and you’ll see that almost every one starts by specifying an entry point. Examples include “Create a plugin with an entry in the left sidebar,” “Create a workspace that opens from a conversation,” and “Create a reader that opens from the right sidebar.” The entry point determines how the plugin appears and how it relates to conversations, making it one of the most important details to include in your prompt. The table below summarizes how the three entry points are used in the official examples.
| Entry point | Official examples | Best suited to |
|---|---|---|
| Left sidebar | 3D famous landmarks gallery, Transformer 3D visualization, DSH pixel-art interface | Standalone tools, showcase apps, global settings |
| Open from a conversation | Poster design workspace, video editing workspace | Workspaces that need to interact with conversations |
| Right sidebar | Paper reader | Companion panels you use while chatting |
| Not specified | Conversation analytics | Let the model choose the layout, then adjust it in a follow-up conversation |
How to Use Creation Mode in DeepSeek Harness: A Quick Start
Basic Steps for Using Creation Mode
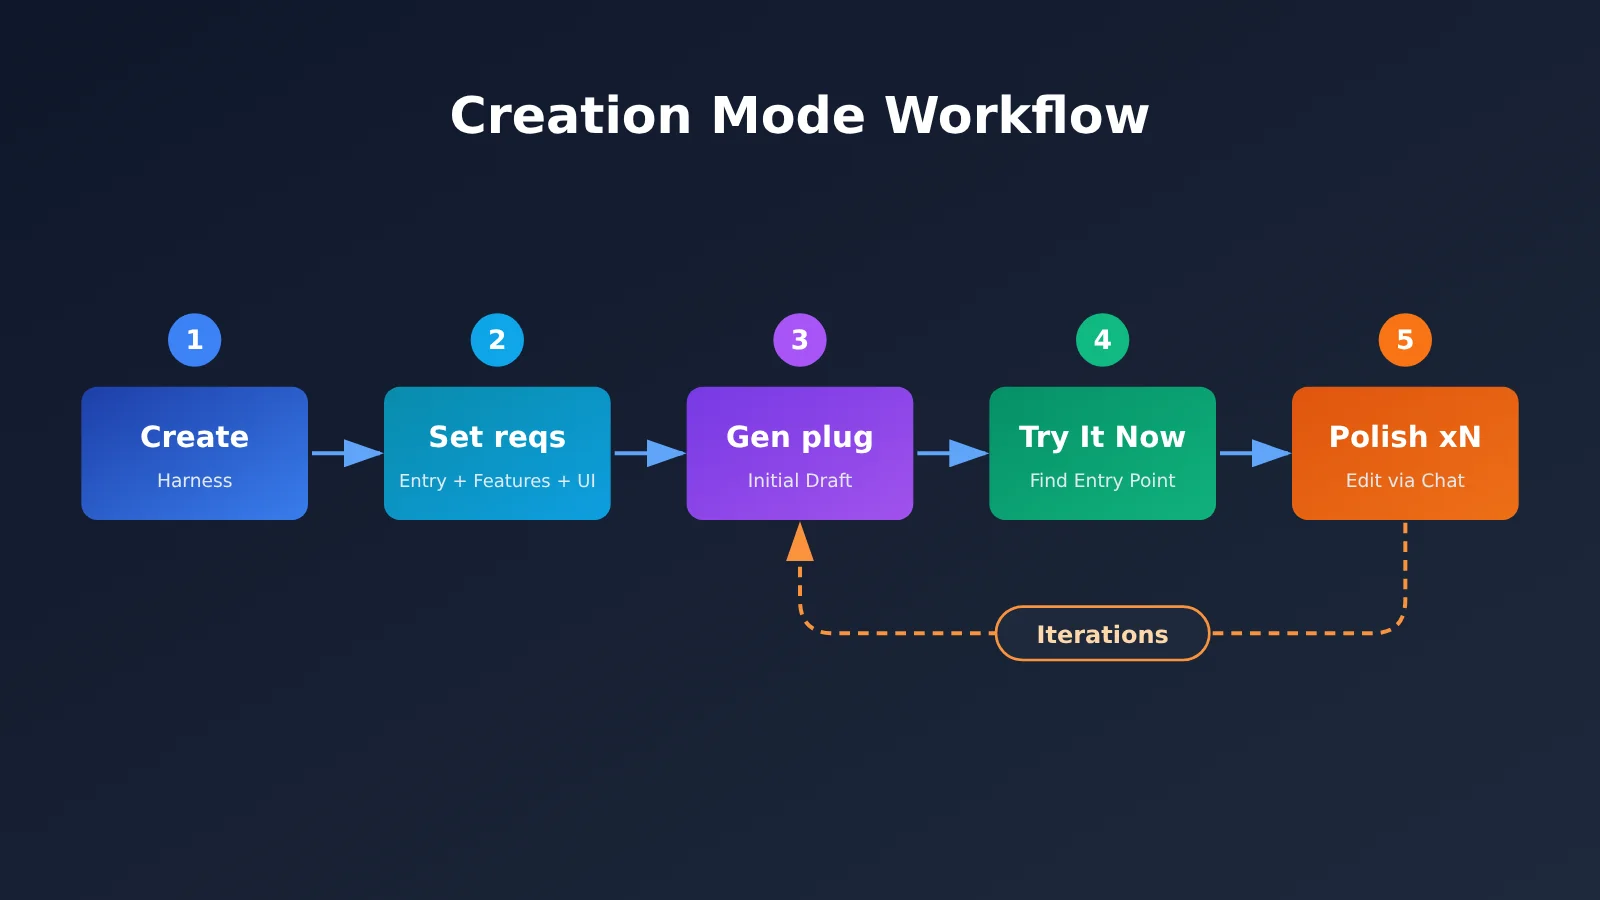
According to the official documentation, the basic process for recreating or creating a plugin is simple:
- Open DeepSeek Harness and select “Creation Mode” in the conversation.
- Enter a prompt describing what you want the plugin to do. Be clear about where it should appear, its core features, and the interface requirements.
- Wait for it to finish generating, then find the plugin in the relevant section and try it out.
- If you spot any issues, describe what you’d like to change in the conversation and refine it over several rounds.
One thing to keep in mind: the official documentation notes that some demo plugins were refined through multiple rounds of conversation. A single-shot prompt may not fully reproduce the results shown in the video. So it’s perfectly normal if the first result isn’t quite right—think of it as a first draft.
Minimal Example: Generate a Plugin with One Sentence
Here’s the shortest possible prompt for Create mode. Just copy it into Harness and select “Create mode.” It’s based on “3D Famous Landmarks Gallery” from the official collection. Its clear structure makes it a good first prompt to try:
Create a DeepSeek Harness plugin with an entry point in the left sidebar.
Use 3D models to showcase the Eiffel Tower in Paris, the Great Wall of China, the Forbidden City,
and another famous building of your choice.
This prompt has just three key details: the entry point is in the left sidebar, the format is 3D models, and the content includes the specified landmarks plus one of your choice. The phrase “of your choice” gives the model room to be creative. It’s also a practical technique: when you don’t have a strong preference about a detail, you can let the model decide.
View the full prompt template (reusable)
[Entry point] Create a DeepSeek Harness plugin {with an entry point in the left sidebar / accessible from a conversation / with an entry point in the right sidebar}.

[Purpose] This is a {plugin type, e.g., workspace / visualization tool / reader / mini-game},
designed to {main goal, e.g., help me understand a concept / complete a design task}.

[Core features]
- Support {feature 1}
- Support {feature 2}
- Support {feature 3}

[Layout]
- Place the {main area} in the {position}, using most of the page
- Place the {secondary area} in the {position}
- Use {reference style, e.g., the dark interface commonly used in video-editing software}

[Default state]
- Keep the default page simple, without extra subheadings or unnecessary information
- Set the default {title / content / parameter} to {specific value}

[Constraints]
- Make sure the panel title and toolbar don't overlap with the native macOS window buttons
- {Other issues to avoid}

[Conversation integration (optional)]
- Also support {action} in a conversation using natural language
🚀 Getting started: If this is your first time using Create mode, start by copying the official prompt exactly and running it to get familiar with where the plugin appears and how it works. Then adapt the template above to your needs. This will help you build a better sense of what to expect from the generated result.
A Formula for Writing Prompts in Create Mode
Comparing the seven official prompts reveals a consistent structure. The table below explains what each element does and shows how it appears in the official prompts. Use it as a checklist when writing your own prompts.
| Element | Purpose | Examples from the official prompts |
|---|---|---|
| Entry point | Determines where the plugin appears | “Add an entry point in the left sidebar,” “Open from the conversation,” “Open from the right sidebar” |
| Plugin type | Clarifies whether it’s a tool, game, or workspace | “An interactive 3D demo game,” “A poster design workspace” |
| Feature list | Lists the capabilities that must be implemented | “Support uploading multiple videos, editing, and exporting” |
| Layout requirements | Specifies where the main and secondary areas go | “Place the preview at the top and the timeline below it” |
| Default state | Controls how the first screen looks | “Set the default poster title to ‘Everything is a plugin’” |
| Things to avoid | Helps prevent known issues in advance | “Avoid native macOS window buttons and prevent overlapping elements” |
| Conversation integration | Lets the plugin interact with the conversation | “Support importing and editing videos in a conversation using natural language” |
A simple rule of thumb: your prompt should include at least the entry point, plugin type, and feature list. Layout and default state determine whether the result is both attractive and easy to use, while avoiding known issues and integrating with the conversation are valuable extras. The more complete your prompt, the more likely it is to produce the result you want on the first try.
DeepSeek Harness Creation Mode: A Breakdown of 7 Official Examples
The official prompt collection includes all 7 demos from the showcase video. Here’s a breakdown by difficulty and key features to help you decide which ones you can reproduce directly and which ones will need more rounds of tweaking.
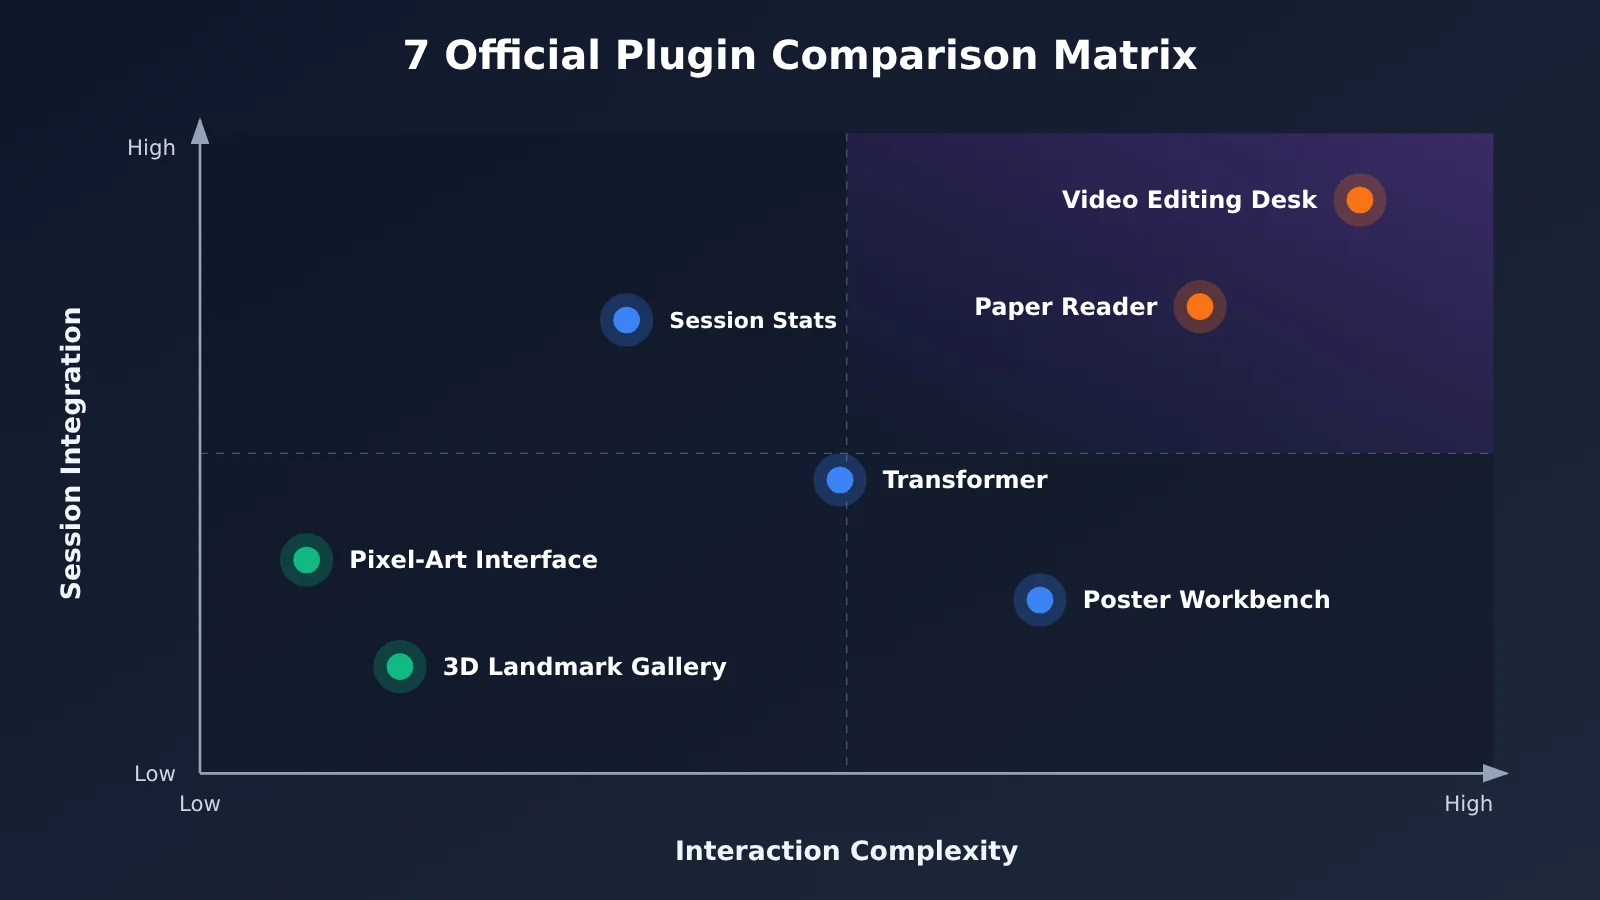
| Example plugin | Entry point | Key features | Replication difficulty |
|---|---|---|---|
| 3D Landmark Gallery | Left sidebar | 3D model showcase, semi-open-ended content | Low |
| Transformer 3D Visualization | Left sidebar | Interactive educational game + UI collision-avoidance constraints | Medium |
| DSH Pixel-Style Interface | Left sidebar | Restyles the entire app, with 5 styles to choose from | Medium |
| Poster Design Workspace | From a conversation | Reuses the official website’s shader patterns and English fonts, with customization options | Medium |
| Video Editing Workspace | From a conversation | Upload, edit, and export multiple videos + natural-language controls | High |
| Paper Reader | Right sidebar | Preserves the original layout; selecting text opens a floating menu | High |
| Conversation Statistics | Not specified | Calculates token usage, cost, and CPU stats from real conversation data | High |
Learning and Showcase Tools: Landmark Gallery and Transformer Visualization
Both plugins live in the left sidebar and work as standalone tools you can open and explore right away. The Landmark Gallery has the shortest prompt, making it a good beginner exercise. Transformer Visualization adds a teaching goal: “Help me understand the internal computation logic of a Transformer.” Descriptions focused on understanding like this guide the model toward designing a step-by-step, interactive demo.
The Transformer example also includes a constraint worth borrowing: “Make sure the panel title and toolbar don’t overlap the native macOS window buttons.” UI details like this often only come to light after the first version is generated. Adding them to the prompt upfront can save you a round of rework.
View the prompts for Transformer 3D Visualization and the Pixel-Art Interface
Create a DeepSeek Harness plugin with an entry in the left sidebar. Make it an interactive 3D demo game
that helps me understand the internal computation logic of a Transformer.
Make sure the panel title and toolbar don’t overlap the native macOS window buttons.
Create a DeepSeek Harness plugin with an entry in the left sidebar that lets me switch the visual style of the entire app.
Offer 5 different styles to choose from, including pixel art.
Workbench Category: Poster Design and Video Editing
Both the poster and video workbenches are designed to open from a conversation, since each centers on a specific creative task. The poster workbench prompt shows how to control the default state: it explicitly says, “Keep the default page simple, without extra subheadings or unnecessary information,” and sets the default title to Everything is a plugin to keep the model from piling on unnecessary elements.
The video editing workbench is the most feature-heavy example in the official demos. It specifies the visual reference (the dark interface of a typical video editor), the layout (preview at the top, timeline below), the features (upload multiple videos, edit, and export), and how it works with the conversation (import and edit using natural language). It’s hard to get this kind of complex setup right in one go, so we recommend getting the preview and timeline working first, then adding natural-language controls step by step.
View the poster and video workbench prompts
Create a poster design workbench plugin that opens from a conversation, using the shader background pattern and English fonts from the DeepSeek Harness website.
Support custom poster titles, text, and shader colors. Keep the default page simple, without extra subheadings or unnecessary information.
Set Everything is a plugin as the default poster title.
Create a video editing workbench that opens from a conversation, using the dark interface and interactions of a typical video editor.
Support uploading multiple videos, editing, and exporting. Place the preview at the top, taking up most of the page;
place the timeline below, with support for importing and editing videos. Also support importing and editing videos in the conversation using natural language.
Productivity Tools: Research Paper Reader and Session Statistics
The research paper reader lives in the right sidebar, making its purpose clear: chat on the left, read papers on the right. Select text and use the floating menu to “Ask in chat,” creating a seamless link between reading and Q&A. The detail in the prompt that “the default question prompt should use the same language as the interface” shows consideration for multilingual use.
The session statistics plugin reads real session data to show total token usage, session count, estimated costs and budget. You can also view a timeline and usage for individual sessions, and monitor CPU activity and utilization. It’s a good fit for power users who spend a lot of time using Harness and want to keep track of their usage. Since it involves local data and system resource monitoring, it’s a good idea to check that the data the plugin displays is within the scope you expect.
View the Research Paper Reader and Session Statistics Prompts
Create a research paper reader accessible from the right sidebar. It should support uploading papers and fully preserve the original layout, fonts, images, and other content without losing any information. When text is selected, show a floating menu with three options: highlight, add a note, and ask in chat.
The default question prompt should use the same language as the interface.
Create a statistics plugin based on my real session data. Show total token usage, the number of sessions, and estimated costs and budget based on token usage. Let me view a timeline of token usage, as well as token usage and costs for each session, and monitor CPU activity and utilization.
Tips for Iterating on DeepSeek Harness Creation Mode
Since the official team has acknowledged that some plugins were refined through multiple rounds of conversation, knowing how to give feedback is just as important as writing the initial prompt. The more specific your feedback, the more precisely the next version can address it. The table below summarizes common issues and how to ask for changes effectively.
| Common issue after generation | Ineffective feedback | Recommended feedback |
|---|---|---|
| Interface elements overlap | “The interface looks a bit messy” | “The panel title and toolbar overlap the macOS window buttons. Move them down to avoid the overlap.” |
| Too much information | “Make it simpler” | “Remove all subheadings and descriptive text from the home page. Keep only the title input field and preview area.” |
| Poor layout | “Try a different layout” | “Move the preview pane to the top and give it most of the space. Move the timeline to the bottom.” |
| Missing functionality | “It’s missing features” | “Add an export button so users can export the edited video.” |
| Wrong style | “It doesn’t look good” | “Use a dark interface inspired by common video editing software.” |
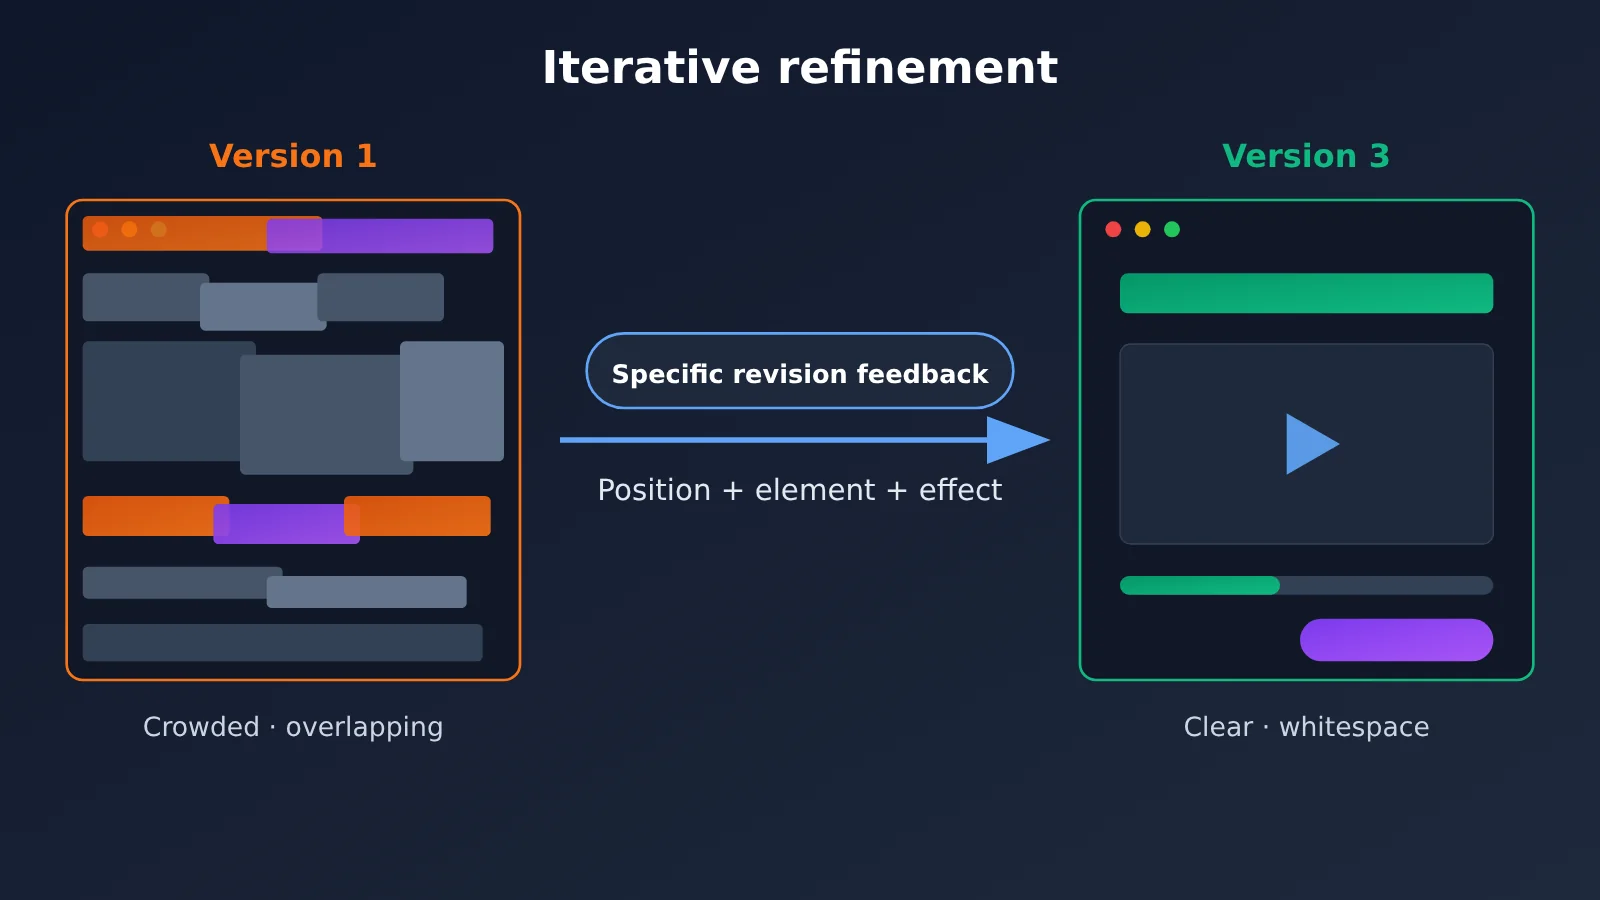
There are two other habits worth adopting when iterating. First, address only one or two issues per round. Asking for too many changes at once can break parts that were already working. Second, try to include three things in your feedback: the position, the element, and the desired result. For example, “Make the export button in the top-right corner stand out with a more prominent color” is much more effective than simply saying, “The button isn’t noticeable.”
Frequently Asked Questions
Q1: What is DeepSeek Harness Creation Mode?
Creation Mode is a conversation mode in DeepSeek Harness. Describe the feature you want in natural language, and Harness will turn it into a plugin. Once it’s ready, you can use it right in the app to customize Harness to your needs.
Q2: How is Creation Mode different from generating code in a regular conversation?
A regular conversation typically gives you a snippet of code that you have to save, run, and integrate yourself. Creation Mode produces a plugin that can be added directly to the Harness interface. You can choose where it appears, and it can work with your conversations, so there’s no integration step.
Q3: Where can I find the official prompt collection?
The official collection includes Chinese and English prompts for the 7 demos featured in the video. It’s available online; see the references at the end of the article for the link. To use a prompt, copy it into Harness and select “Creation Mode.”
Q4: What kinds of plugins are a good fit for DeepSeek Harness Creation Mode?
The official examples cover a wide range of use cases:
– **Learning visualizations**: For example, an interactive 3D demo of how Transformer computations work
– **Creative workspaces**: For example, poster design and video editing
– **Reading tools**: For example, a paper reader that preserves the original layout
– **Interface customization and usage statistics**: For example, changing the overall theme or tracking token usage and costs
Q5: Why doesn’t copying an official prompt produce the same result as the video?
The official team notes that some plugins were refined over multiple rounds of conversation, so a prompt used in a single generation may not fully reproduce what you see in the video. Treat the first result as a draft, then refine it step by step using the iteration tips in this article.
Q6: How should I choose where a plugin appears?
Standalone tools and global settings work well in the left sidebar. Workspaces built around a specific creative task that need to interact with the conversation are best opened from the conversation. For an auxiliary panel you can refer to while chatting, use the right sidebar.
Q7: What should I keep in mind when using DeepSeek Harness Creation Mode?
First, complex plugins are hard to get right in one try, so set aside time for several rounds of refinement. Second, include interface constraints in your prompt ahead of time—for example, preventing elements from overlapping the system window buttons. Third, for plugins that access real conversation data, local files, or system resource metrics, check after generation that they read only the data you expect.
DeepSeek Harness Creation Mode: Key Takeaways
- Core idea: Turn ideas into plugins through conversation, then use them in Harness as soon as they’re generated.
- Three ways to get started: Use the left sidebar, the right sidebar, or start from a conversation. Mention where the plugin should appear at the beginning of your prompt.
- Prompt formula: The essentials are the entry point, the plugin’s form, and a feature list. Layout, default state, and constraints are useful extras.
- Official examples: Seven demos cover scenarios such as visualization, theming, posters, video, research papers, and statistics.
- Iterate over multiple rounds: Complex plugins often need repeated adjustments. It’s normal for the first version not to be perfect.
- Tips for making changes: Focus on one or two issues per round. Describe changes using “location + element + desired result.”
Summary
Using DeepSeek Harness Creation Mode comes down to three things:
- Choose the right entry point: Decide whether the plugin belongs in the left sidebar, the right sidebar, or should be launched from a conversation, based on how it relates to the conversation.
- Include all the key details: Follow the structure of the seven official prompts, and clearly describe the plugin’s form, features, layout, default state, and constraints.
- Be patient and refine: Treat the first generation as a draft, then iterate with specific feedback.
We recommend starting with a simple example like “3D Famous Landmarks Gallery” to learn the workflow, then rewriting the prompt for a tool you’d find useful in your daily work. As the official message puts it: What would you like to add to your Harness?
📚 References
- DeepSeek Harness Creator Mode Prompt Collection (Chinese): A collection of prompts for the 7 demo videos officially compiled by DeepSeek
- Link:
cdn.deepseek.com/harness/dsh-creator-mode-prompt-collection-zh.html - Description: Includes complete prompts for a 3D landmark gallery, Transformer visualization, pixel-art interface, poster and video workspace, paper reader, and conversation statistics. Use it as a reference when recreating the official demos.
Author: Technical Team
Note: This article is based on DeepSeek’s official introduction to Creator Mode and its prompt collection. For feature details, refer to the current version of DeepSeek Harness.