Author’s note: This article walks through whether Mika is worth installing, how to set it up in five steps, and how to run your first task. It also covers the requirements and common issues.
Here’s the short version: Mika is an open-source Android phone Agent. Tell it what to do, and it opens apps, taps buttons, types, and scrolls on an invisible “background screen” while you use your phone as usual. It doesn’t need root access or app APIs. You configure the model yourself, either with a key or by signing in to an account.
Whether it’s worth installing comes down to two things: your phone needs Android 12 or later (Android 14 or later is recommended), and you need a model that supports tool calling. If you meet both requirements, try it on a spare phone first. If not, you’ll be limited to chat, web, and file features.
A note upfront: This article is based on Mika’s official README and documentation, public GitHub data, and its creator’s launch post on X. I haven’t tested it on individual phone models. Anything attributed to the project is a claim from its maintainers, and figures include the date they were checked. The repository was created on 2026-10-29, and as of 2026-11-02, the latest stable release was v0.1.33. It’s evolving quickly, so check the repository’s Releases page for the latest information.
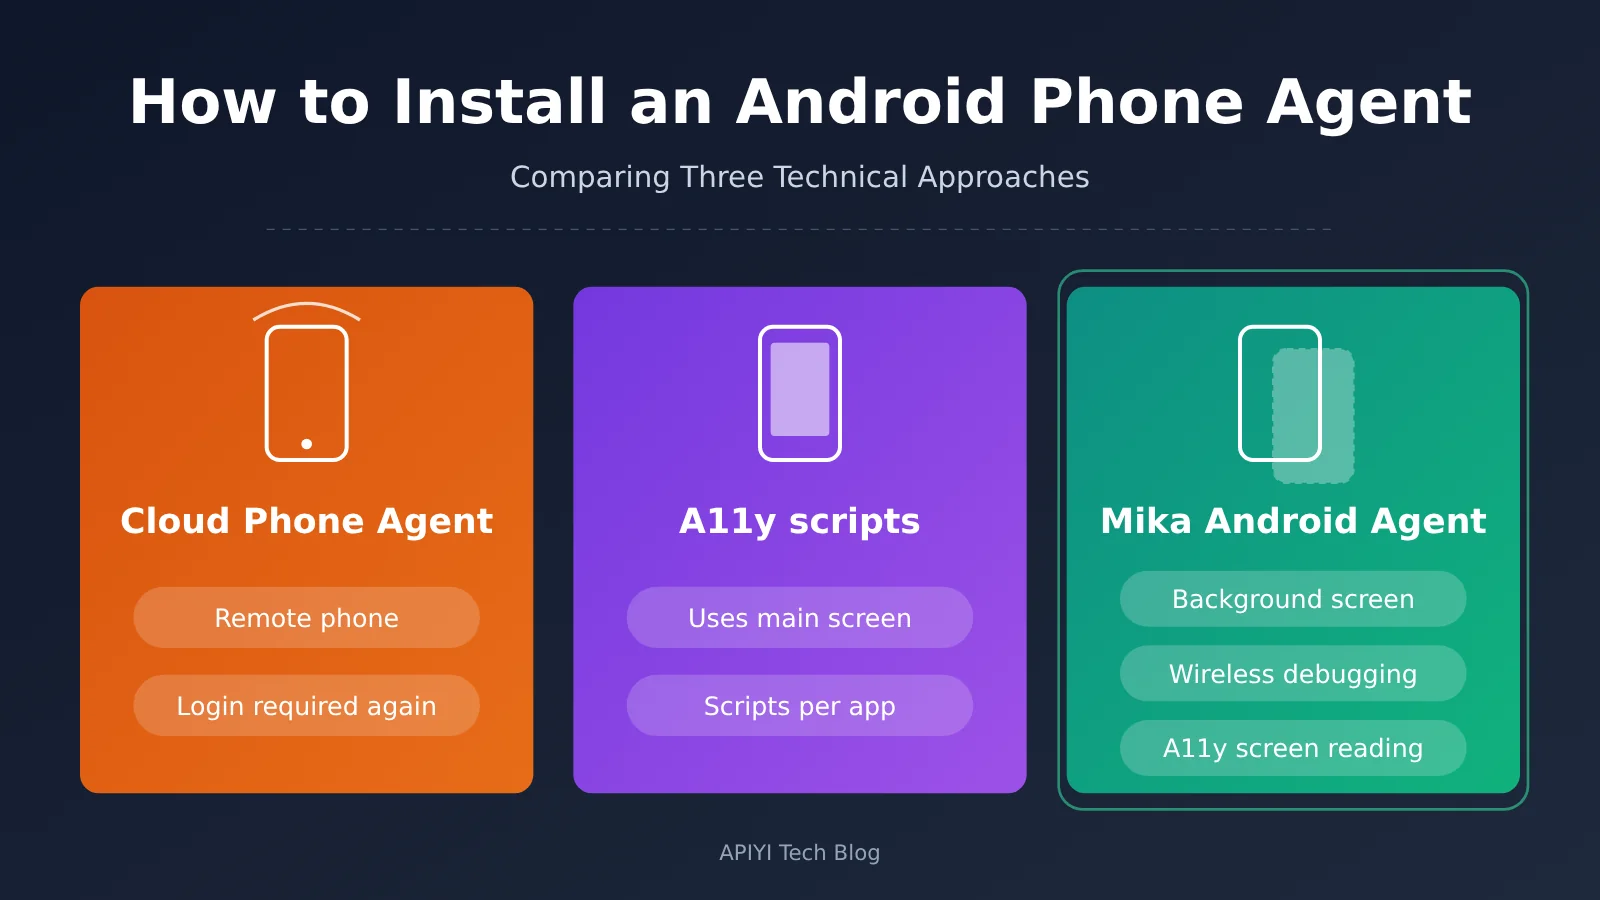
Mika Android Agent: Popularity and Positioning
Let’s start with a few numbers you can verify on GitHub. As of November 2, 2026, a GitHub API query showed that the wangzan101/Mika repository had 4,414 stars, 840 forks, and 52 open issues. Its primary language was Kotlin, and it used the Apache-2.0 license. The v0.1.33 arm64 package had 2,491 downloads, and the universal package had 831. These are just a snapshot from that day. Popularity doesn’t mean it’ll run reliably on your phone.
In the author’s launch post on X (October 30, 2026), they wrote: “It reuses your existing logged-in sessions—no extra authorization, no root, and no computer needed. You can keep using your phone while it works in the background, without getting in your way.” That’s the author’s own claim. The demo GIFs in the README show it sending a message to the File Transfer Assistant, summarizing a group chat, and adding a charger to a shopping cart. But the project hasn’t published any success-rate data, so those demos don’t establish that it’s consistently reliable.
Why Mika Doesn’t Take Over Your Android Screen
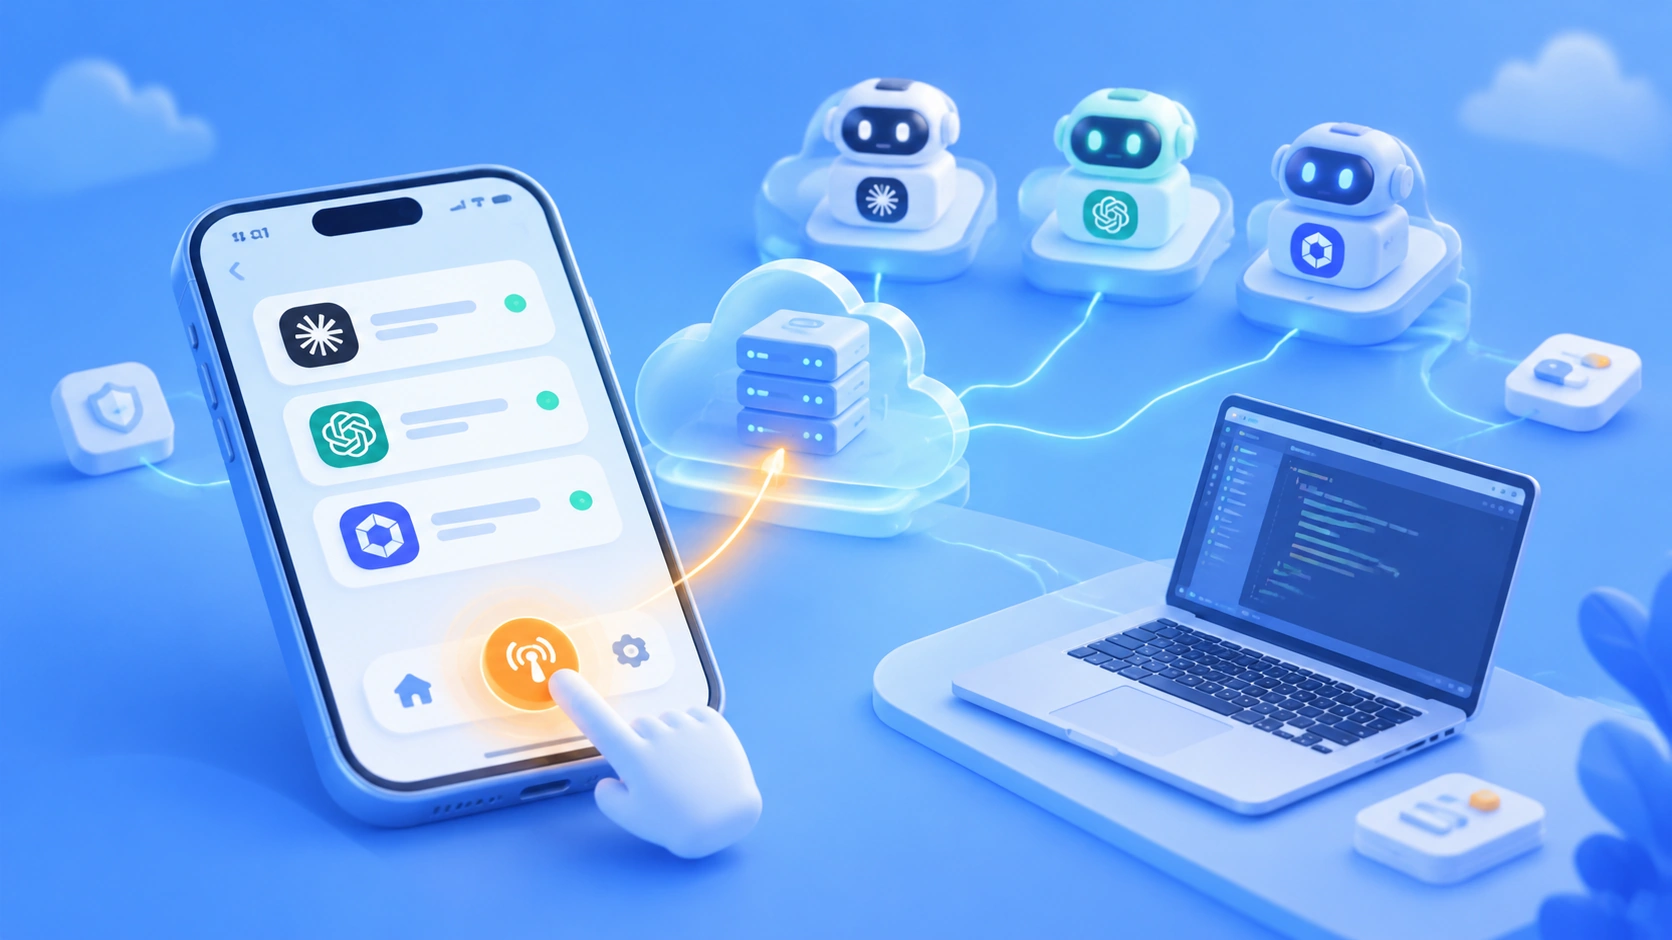
Typical phone automation either takes over the screen you’re using or runs on a separate phone. Mika instead operates apps on an invisible “background screen.” Think of the background screen as a separate virtual screen on your phone: you can’t see it, but apps can open and run on it normally. If you want to check progress, you can open the small preview it provides.
According to the official documentation, Mika relies on three capabilities, each with a different job:
- Background screen: Hosts apps and performs taps and text input without interfering with what you’re doing on the main screen.
- Wireless debugging: A built-in Android developer option originally intended for debugging a phone from a computer over Wi-Fi. Mika uses it to start a built-in “helper.” The project says that after a one-time pairing, it connects automatically and, with your permission, turns wireless debugging back on if the system disables it.
- Accessibility: An Android permission for assistive tools such as screen readers that can read text and buttons on the screen. For interfaces it can’t read, Mika includes optical character recognition (OCR). If you configure a model that can understand images, it can also use images to find buttons and input fields.
The official documentation doesn’t describe the implementation details of these capabilities, and we won’t speculate here. What you need to know is this: if you only want to chat, browse the web, or manage files, you can skip the wireless debugging setup described later. You only need it if you want Mika to operate phone apps.
Comparing Three Approaches to Android Agents
| Approach | Where it runs | Does it occupy your screen? | Does it need adaptation for each app? |
|---|---|---|---|
| Cloud phone agent | A remote cloud phone | No, but your logged-in sessions are in the cloud | Usually not |
| Accessibility scripts | Your own phone | Yes, it occupies the main screen | Usually requires app-specific rules |
| Mika | Your own phone | The project says it operates on a background screen without occupying the main screen | The project says it doesn’t |
The first two rows are general descriptions of these approaches, not assessments of specific products. The Mika row comes from its README, which says it “looks at the screen and finds buttons like a person, without requiring apps to expose an API or be adapted in advance.” Its most obvious difference from a cloud phone is that it can reuse apps you’re already logged in to on your own phone.
Before You Install Mika on Android: 4 Requirements to Check
Take a minute to check these four requirements before installing. It could save you a lot of troubleshooting.
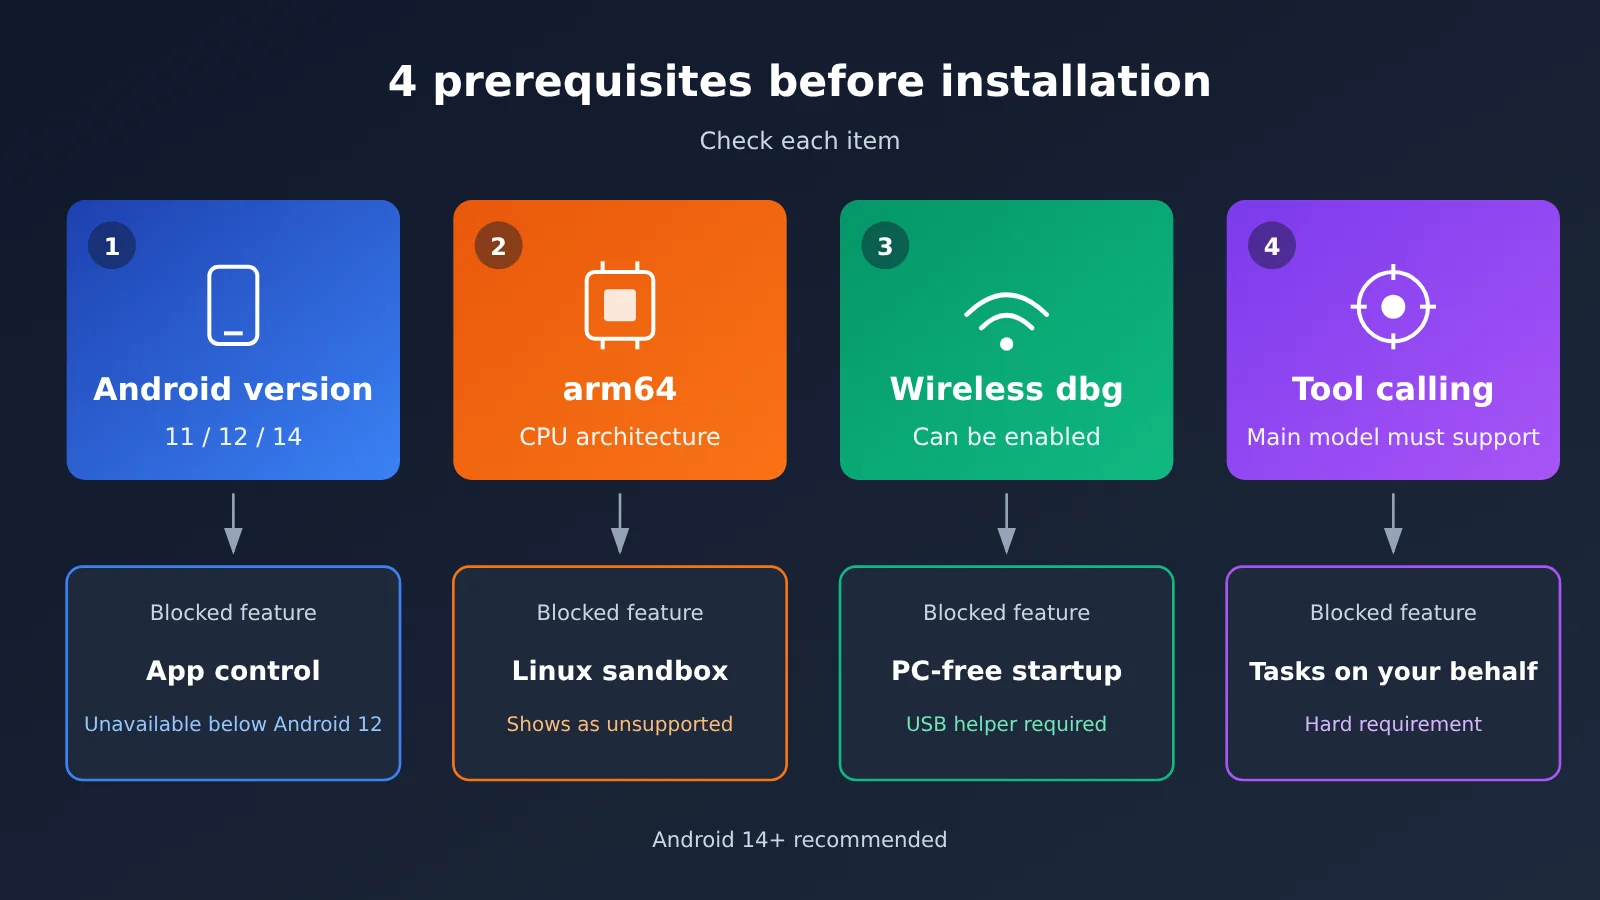
| Requirement | What you need | What happens if you don’t meet it |
|---|---|---|
| Android version | Android 11+ for chat, web, and files; 12+ to control apps; 14+ recommended | Below Android 12, Mika can’t control apps. On Android 12 and 13, actions on the background screen may affect focus on the main screen. |
| CPU architecture | arm64 for the Linux sandbox | You can still install Mika, but the sandbox will show “This device is not supported.” |
| Wireless debugging | Available and enabled in system settings | You’ll need a computer and USB to start the assistant, and you’ll have to do it again after a restart. |
| Model tool calling | The primary model must support tool calling | The primary model won’t be able to carry out tasks for you. |
The official explanation for the Android version recommendation is that, starting with Android 14, the background screen has its own focus and won’t interfere when you’re typing on the main screen. Android 12 and 13 still work, but you may experience interruptions while typing.
Tool calling means the model can do more than chat: it can output structured instructions such as “tap here” or “type this text” for a program to execute. Mika’s official documentation states that “the primary model must support tool calling”—it’s a hard requirement.
There are two other things to know. The built-in browser is a desktop browser: it preserves your login sessions and leaves any website blocking pages for you to handle. The Linux sandbox is separate for each conversation and can run Python, Node, and shell commands. It’s disconnected from the internet by default; when needed, turn on “Allow scripts to access the internet” under “Files and computing environment.”
If you’re not sure whether your phone is compatible, Mika offers a built-in check. After installing, go to Settings › Recovery and repair › Compatibility check. The 12 checks take about a minute, and you can submit the results to the GitHub device compatibility feedback page with one tap.
Set Up Mika on Android and Run Your First Task in 5 Steps
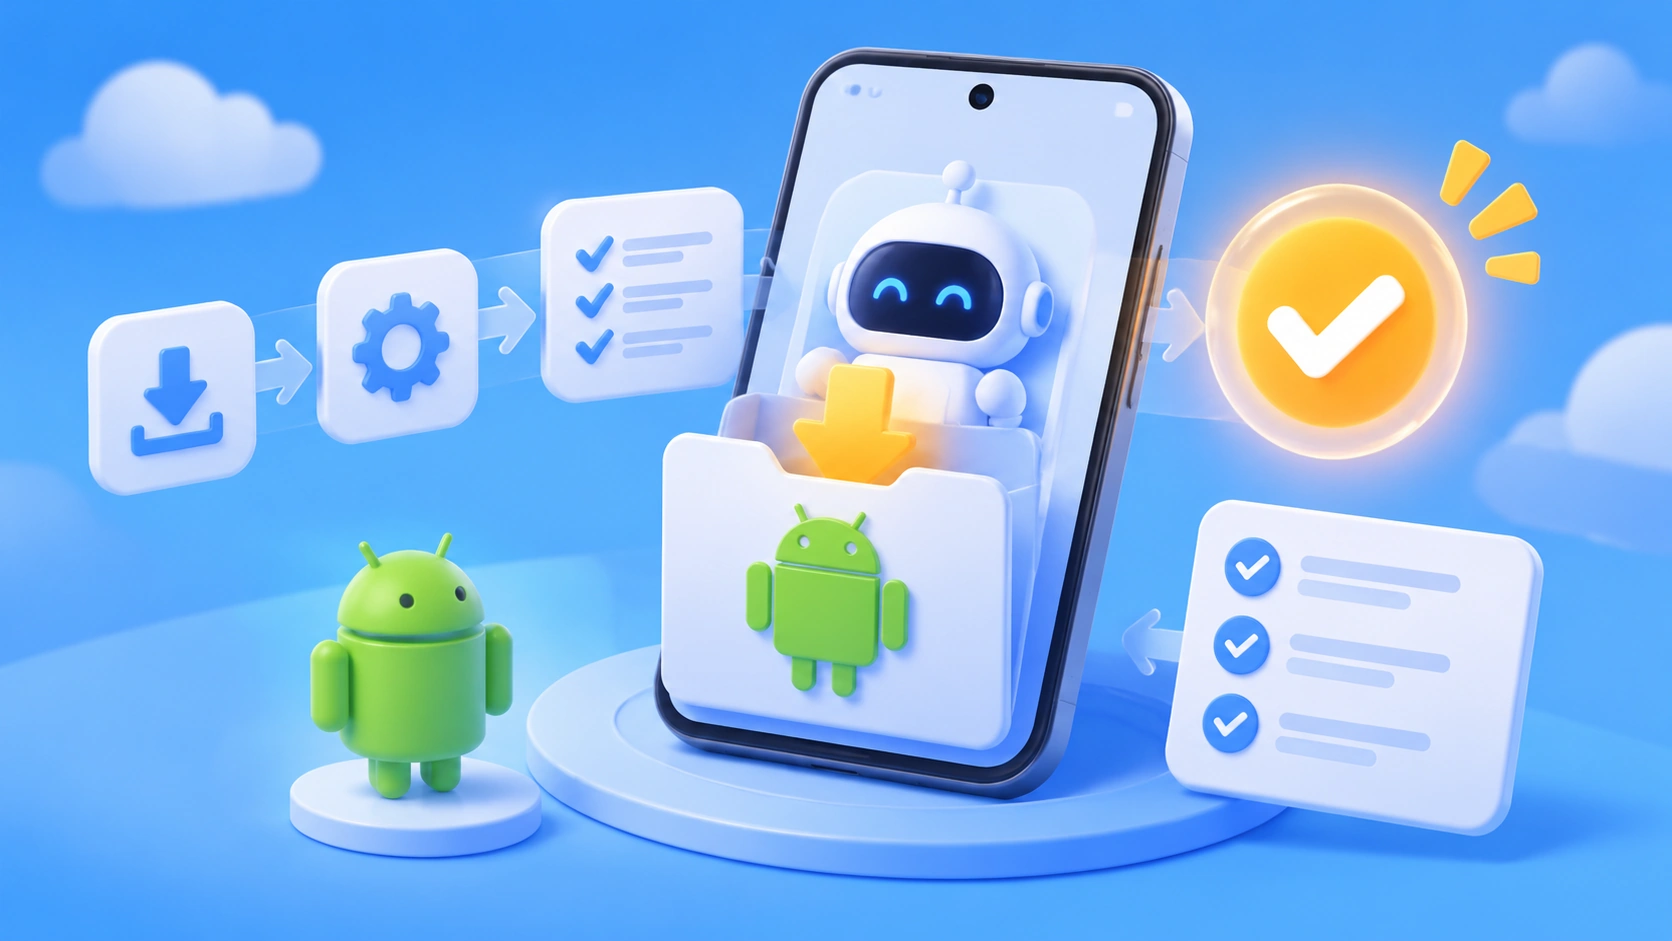
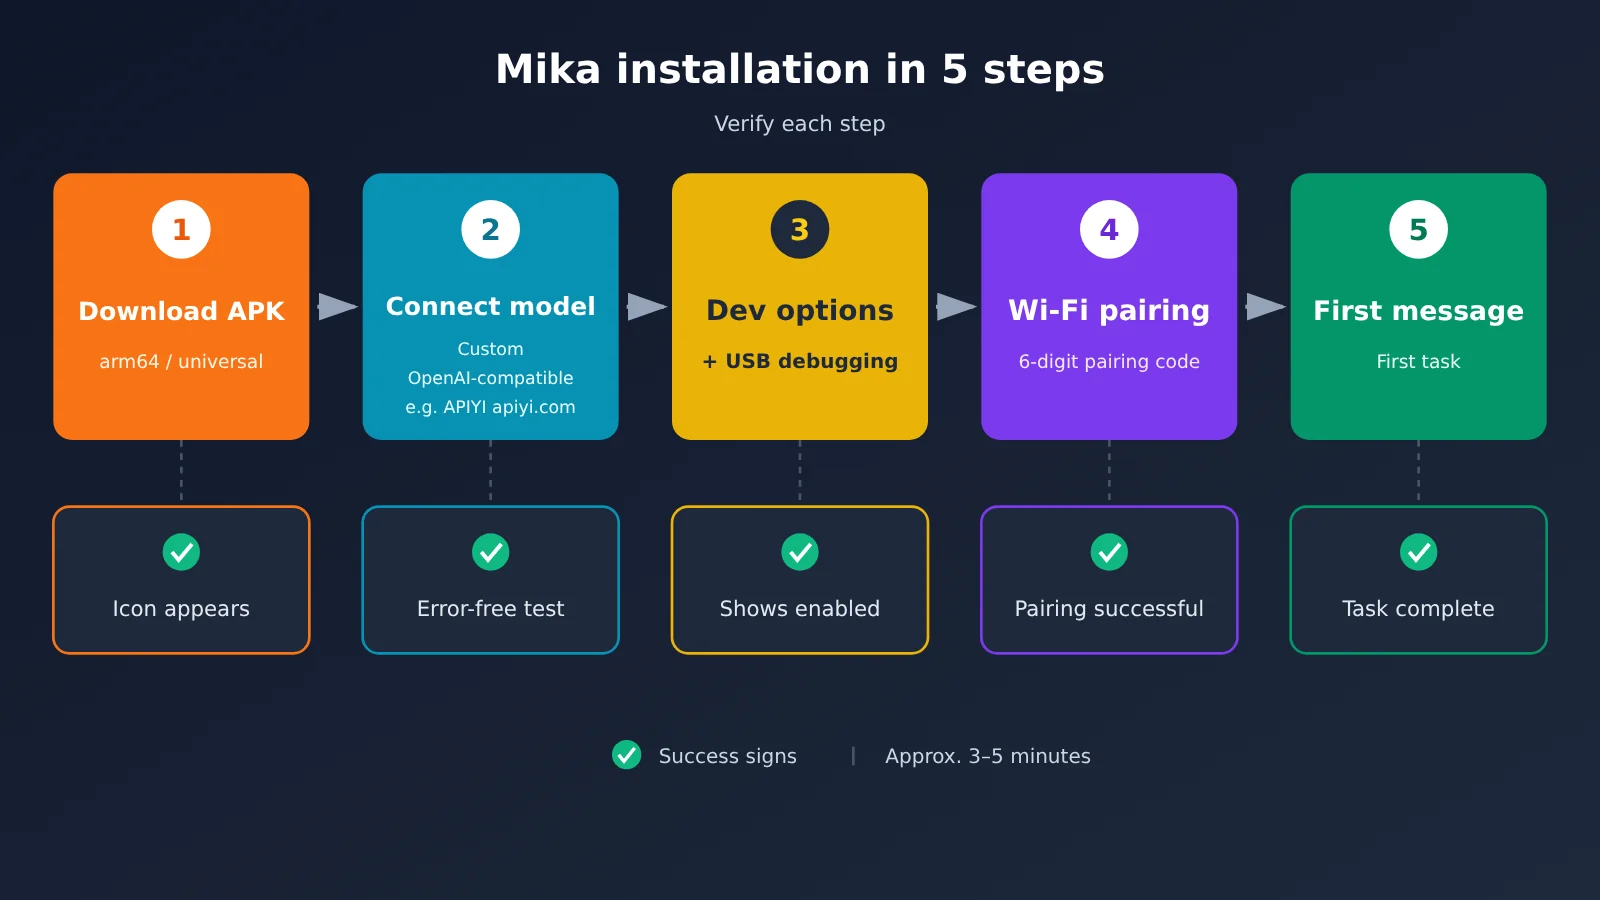
The official README says you can get started in three steps, but the third step, “Set up phone control,” has six steps of its own. To make it easier to verify your progress, we’ve reorganized the process into five steps.
Step 1: Download and install the APK
- What you’ll see: The repository’s Releases page lists two installation packages for v0.1.33:
Mika-v0.1.33-arm64.apkand the universal version,Mika-v0.1.33.apk. - What to do: Download the arm64 version if your phone uses arm64. If you’re not sure, use the universal version. Download it in your browser and install it. Android may ask you to allow the browser to install unknown apps.
- How to verify: The Mika icon appears on your home screen, and you can open the app’s home page.
Updates are published only through this repository’s Releases page. You can also download and install them directly from About › Check for updates in the app. Don’t install packages from other sources.
Step 2: Connect a Model (Custom OpenAI-Compatible Endpoints Supported)
Mika doesn’t come with a model. Go to Settings › Models and choose a built-in preset (such as DeepSeek, 通义千问, Kimi, OpenAI, Anthropic, Gemini, OpenRouter, or Ollama), or select “Custom.” According to the official documentation, custom providers support OpenAI-compatible, Anthropic, Gemini, and OpenAI Responses interfaces.
If you want to switch between models from different providers with a single API key, you can connect to APIYI under “Custom.” APIYI at apiyi.com provides a standard OpenAI-compatible interface. Fill in the settings as follows:
- Interface type:
OpenAI Compatible - API endpoint:
https://api.apiyi.com/v1 - API key: The key you generated in the APIYI console
- If the provider doesn’t return a model list, click “Enter Model Name Manually”
To be clear, APIYI and Mika don’t have an official partnership. This setup works through compatibility with the OpenAI-compatible interface protocol. Whether a particular model works depends on whether it supports tool calling, so you’ll need to verify it yourself with “Test and Save.” Also, Mika assumes custom providers can’t process images by default. If your chosen model supports image understanding, you’ll need to manually turn on “Can See Images” in the provider details.
- How to tell it worked: “Test and Save” completes without an error, and Mika automatically selects a primary model when you connect your first provider.
🎯 Configuration tip: A phone agent needs strong tool-calling capabilities from its primary model. Start by choosing two or three models on APIYI at apiyi.com that support function calling. Use “Test and Save” for each one in Mika, then compare them on the same simple task and make the most reliable one your primary model.
Step 3: Enable Developer Options and USB Debugging
In Mika’s settings, find “Set Up Phone Control.” You’ll see a six-item checklist. The current step will be highlighted with a button that takes you to the relevant system settings page. The official estimate for the whole setup is 3 to 5 minutes. The paths below are for stock Android; names may differ on your phone.
- Developer options: Go to
Settings › About phoneand quickly tap “Build number” 7 times. If you’ve set a screen lock, you’ll be asked to enter it. Once it’s enabled, the first item on Mika’s checklist will show “Enabled.” - USB debugging: Go to
Settings › System › Developer options › USB debugging. When asked “Allow USB debugging?”, tap OK. You don’t need to plug in a cable. This lets Mika continue controlling your phone after pairing, even if you disconnect from Wi-Fi. Keep it enabled going forward. - Checklist item 3, “Enable Mika’s accessibility service”: We recommend tapping “Skip (Mika will enable it after pairing).” Android marks APKs downloaded from the web as “restricted settings,” so enabling it yourself can be tricky. The only trade-off is that you’ll need to manually enter a 6-digit pairing code in the next step.
Step 4: Pair Using Wireless Debugging
This is the step where things are most likely to go wrong, so follow the order:
- Connect to any Wi-Fi network. It doesn’t need internet access.
- In Developer options, turn on “Wireless debugging.” When asked “Allow wireless debugging on this network?”, check “Always allow on this network,” then tap Allow.
- Tap the words “Wireless debugging” (not the switch next to them) to open its settings page, then tap “Pair device with pairing code.” A 6-digit code and an IP address and port will appear.
-
If the accessibility service isn’t enabled, enter the 6-digit code in the notification panel. You must keep the pairing window open; switching apps, pressing Back, or locking the screen will invalidate the code.
-
How to tell it worked: You don’t need to do anything for the final checklist item, “Auto-connect.” After a few seconds, you’ll see “Phone control is set up.”
Step 5: Give It Your First Instruction
The official recommended first instruction is: “Set alarms for 9:40 and 10:00 tomorrow morning.” This task only involves the system clock—it doesn’t touch your accounts or payments—so it’s a good way to test the whole setup.
- What you’ll see: Task progress appears in the conversation. The “Background Screen” tab next to “In Progress” in the sidebar shows which app it’s using and what step it’s on.
- How to tell it worked: Open the Clock app and look for two new alarms. When the task is done, a summary appears in the conversation with the total time, number of exchanges with the model, and tokens used.
| Step | Success indicator |
|---|---|
| 1 Download and install | The Mika icon appears on your desktop and opens |
| 2 Connect a model | “Test and Save” succeeds and automatically selects the primary model |
| 3 Developer options + USB debugging | Items 1 and 2 on the checklist are checked |
| 4 Pair wireless debugging | “Phone operation is set up” appears |
| 5 First instruction | Two new alarms appear in the Clock app |
Three Mika Android Agent Tasks You Can Copy
Once the alarm test works, try these three tasks. The first two come from the official README and demo; the third uses the official “Current Screen” feature.
Task 1: Summarize a group chat
- Prompt: “Open WeChat and summarize what was discussed in the ‘Project Team’ group today.”
- Expected result: It opens WeChat in the background screen, reads through today’s chat history, and gives you a summary.
- If it fails: If it finds the wrong group, give it the full group name. If the chat history is too long, try “Only summarize messages sent after 2 p.m. today.”
Task 2: Schedule a weather check
- Prompt: “Check the weather every morning at 8 and only tell me if it’s raining.”
- Expected result: It creates a scheduled task with a condition, so it won’t bother you when it isn’t raining.
- If it fails: First remove the schedule and say, “Check today’s weather now.” Once you’ve confirmed it can check the weather, add the schedule and condition back in.
Task 3: Send it your current screen and ask how to reply
- Steps: In a chat, double-tap the floating capsule to send the current screen, then say: “What’s a good way to reply to this message? Give me two versions.”
- Expected result: It suggests replies based on what’s on the screen, and you decide whether to send one.
- If it fails: If it can’t read the screen clearly, switch to a model that can view images, or copy the other person’s message into the conversation and ask again.
In the default “Ask Mode,” it only asks for confirmation before steps that cost money, such as placing an order, submitting an order, or confirming a page that shows an amount due. It won’t ask before sending messages, posting, submitting forms, deleting things, or changing settings—it just does them. The first two tasks only read information without changing anything, so they’re relatively safe. If you ask it to send a message for you, check the wording first.
6 Common Mika Android Agent Problems and Workarounds
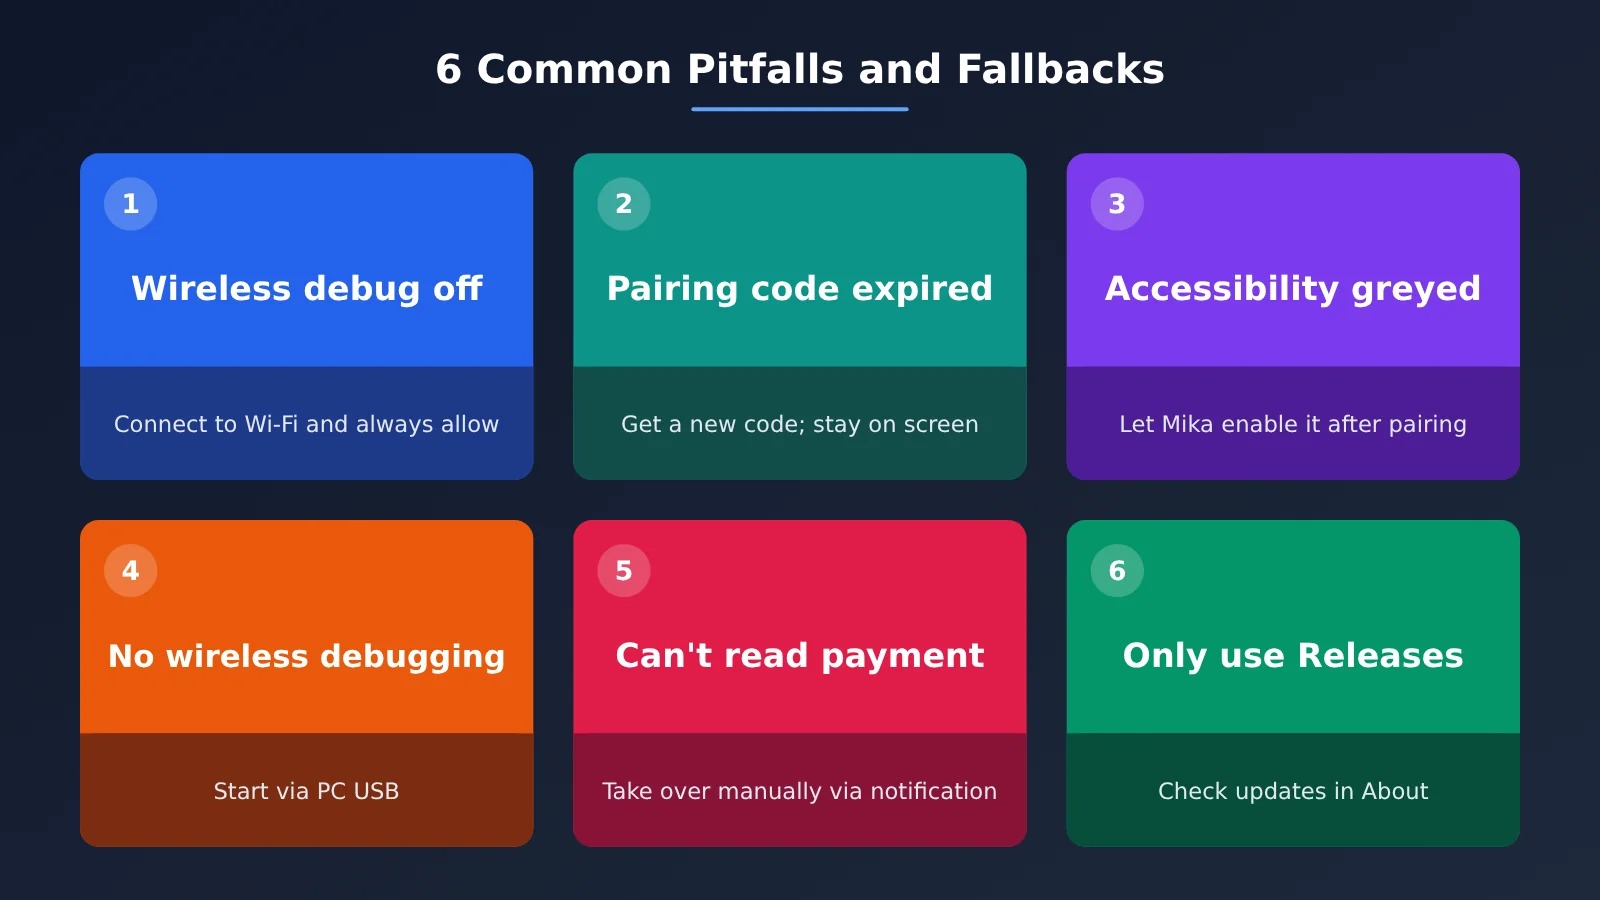
| Problem | Cause (per official documentation) | Workaround |
|---|---|---|
| Wireless debugging turns itself off | You aren’t connected to Wi-Fi, or you didn’t check “Always allow” | Connect to Wi-Fi, allow debugging, and check the box. If you switch Wi-Fi networks, you’ll need to allow it again. |
| “Pairing code is incorrect or expired” or “Pairing window closed” | The code changes every time you open the pairing window. Switching apps, going back, or locking the screen closes it. | Return to “Wireless debugging” and tap “Pair device with pairing code” to get a new code. Stay on that screen while entering it. |
| The accessibility switch is grayed out | An APK installed from the web is marked as a “restricted setting” | Skip it and let Mika enable it after pairing, or go to Settings › Apps › Mika › ⋮ › Allow restricted settings. |
| There’s no “Wireless debugging” option | Some devices don’t provide it | Start Mika over USB using a computer with adb installed. You’ll need to run the command again after restarting your phone. |
| Mika can’t see payment or password screens | These screens block screenshots | Take over when prompted by the notification, then hand control back when you’re done. |
| You want to update | Updates are published only on the repository’s Releases page | Go to About › Check for updates or visit the Releases page. |
If you can’t find wireless debugging, the official USB startup command is:
adb shell sh /sdcard/Android/data/com.wangzan101.mika/files/usb-start.sh
If you see “Phone assistant has stopped,” open Mika once, then run the command. Another common issue is getting stuck on “Automatic connection.” Try turning wireless debugging off and back on, then retry. You can also switch to a phone hotspot or home Wi-Fi—some routers block devices from discovering each other. Alternatively, under “Enter wireless debugging port,” manually enter the number after the colon in “IP address and port.”
If you still can’t get it working, tap “Copy diagnostic information” at the bottom of the setup wizard. According to the official documentation, it includes the version, device model, status of each step, and the most recent error, but not your API key, chat content, or screen content. You can safely paste it into an issue.
Who the Mika Android Agent Isn’t Right For Yet
People who need iOS support. Mika is Android-only; iOS isn’t supported.
People who want fully unattended payments. For steps like logging in, entering verification codes, and making payments, Mika sends you a notification to take over. It also can’t see payment or password screens. Although autonomous mode doesn’t ask for confirmation before payment, the official documentation says, “You are responsible for actions you approve and actions Mika takes on your behalf in autonomous mode.” It recommends using ask mode for important matters.
Teams that need enterprise-grade auditing. Mika’s stated approach is “no Mika server”: conversations and run logs are stored only on your device. Settings include “Token Usage” statistics by day, provider, and model. But the documentation doesn’t mention enterprise features such as centralized auditing or multi-user permissions. The official disclaimer also warns that automating third-party apps and websites may violate their terms of service, so you’ll need to assess that yourself.
If you work mainly on a computer, Mika also offers CLI + Skill and MCP options, so AI tools on your computer can hand tasks off to your phone. You can also use mika ui to open the task console in a browser. However, actions that require your approval can only be handled on your phone.
Frequently Asked Questions
Q1: What is Mika, the Android phone agent?
It’s an Apache-2.0 open-source Android app. The official description calls it “an AI assistant on your phone: say what you need, and it operates apps and browses the web to get things done.” It works on a background screen you can’t see and doesn’t require root.
Q2: How is Mika different from accessibility automation scripts?
Traditional accessibility scripts usually operate on the main screen and require rules written for each app. Mika says it operates on a background screen, with a model looking at the screen to find buttons, so it doesn’t need to be adapted in advance. You’ll need to test which approach is more reliable on your device.
Q3: What version is Mika on, and how often is it updated?
As of 2026-11-02, the latest stable release is v0.1.33, published on 2026-11-01. There’s also a prerelease with root mode. The repository was only created on 2026-10-29, and versions are changing quickly, so check the Releases page for the latest information.
Q4: Can I use it without setting up wireless debugging?
Yes. Chatting, researching online, and handling files aren’t affected; Mika just won’t be able to operate apps on your phone. The official documentation says, “You can skip this step if you only want to chat, browse the web, and handle files.”
Q5: Can Mika connect to models through APIYI?
Yes. Under “Custom,” select the OpenAI-compatible interface, enter `https://api.apiyi.com/v1` as the address, and provide the API key you generated at APIYI apiyi.com. This is protocol-level compatibility, not an official partnership. The primary model must support tool calling, and you’ll need to verify that it works using “Test and Save” and real tasks.
Q6: What are Mika’s known limitations?
Operating apps requires Android 12 or later, and on Android 12 and 13 it may affect focus on the main screen. The sandbox is limited to arm64. Mika can’t see payment or password screens. Some devices don’t have wireless debugging and need a computer to start it over USB. The developers haven’t published success-rate data, and there are no third-party comparisons of how the background screen performs across different manufacturers’ systems.
Mika Android Phone Agent: Key Takeaways
- In a nutshell: An open-source Android agent that taps through apps for you on a background screen—no root required.
- Four requirements: Android 12+ (14+ recommended), arm64, working wireless debugging, and a primary model that supports tool calling.
- Setup essentials: Skip accessibility, check “Always allow on this network,” and don’t leave the pairing screen while entering the code.
- Model connection: Enter an OpenAI-compatible endpoint in the custom settings, such as the API endpoint from APIYI at apiyi.com.
- Safety limits: Ask mode only stops to confirm spending. It won’t ask before sending messages, deleting items, or changing settings.
- Data note: Popularity figures are as of 2026-11-02. The demo GIF doesn’t represent the success rate.
Conclusion: Try the Android Agent on a Spare Phone First
Mika brings phone agents to Android without requiring root, app integrations, or control of your main screen. But it’s still very new: the repository is only a few days old, the version is still v0.1.x, and the project hasn’t published a success rate. A cautious approach is to:
- Check compatibility first: Confirm your Android version, architecture, and wireless debugging with the compatibility checklist.
- Get it running on a spare phone: Complete the five-step setup and test the full workflow with an alarm task.
- Then decide whether to use your primary phone: Try it on the spare for a few days and make sure its behavior in ask mode meets your expectations before installing it on your main device.
For the model, try comparing several models that support tool calling with a single API key through APIYI at apiyi.com. That’ll help you find the primary model that performs most reliably on your phone tasks.
📚 References
- Mika GitHub Repository: Source code, README, and Releases downloads
- Link:
github.com/wangzan101/Mika -
Note: Installation packages are published only through Releases here.
-
Mika Setup Guide: Six steps for setting up phone control and a troubleshooting table
- Link:
github.com/wangzan101/Mika/blob/main/docs/setup-guide.md -
Note: Official guidance for wireless debugging, pairing codes, restricted settings, and other issues.
-
Mika Model Guide: Providers, custom endpoints, and the roles of the four models
- Link:
github.com/wangzan101/Mika/blob/main/docs/models.md -
Note: Configuration details, including the main model’s tool-calling requirement and the image viewing toggle.
-
Mika Modes Guide: Ask mode and autonomous mode
- Link:
github.com/wangzan101/Mika/blob/main/docs/modes.md -
Note: Which actions Mika asks about first and which it performs directly.
-
Author’s Announcement: Mika open-source announcement
- Link:
x.com/wangzan101 - Note: The author’s own description of the project’s purpose.
Author: APIYI Technical Team
Technical support: If you run into issues configuring a model endpoint, contact us through the APIYI homepage at apiyi.com. For more integration guidance, visit the documentation center at docs.apiyi.com.