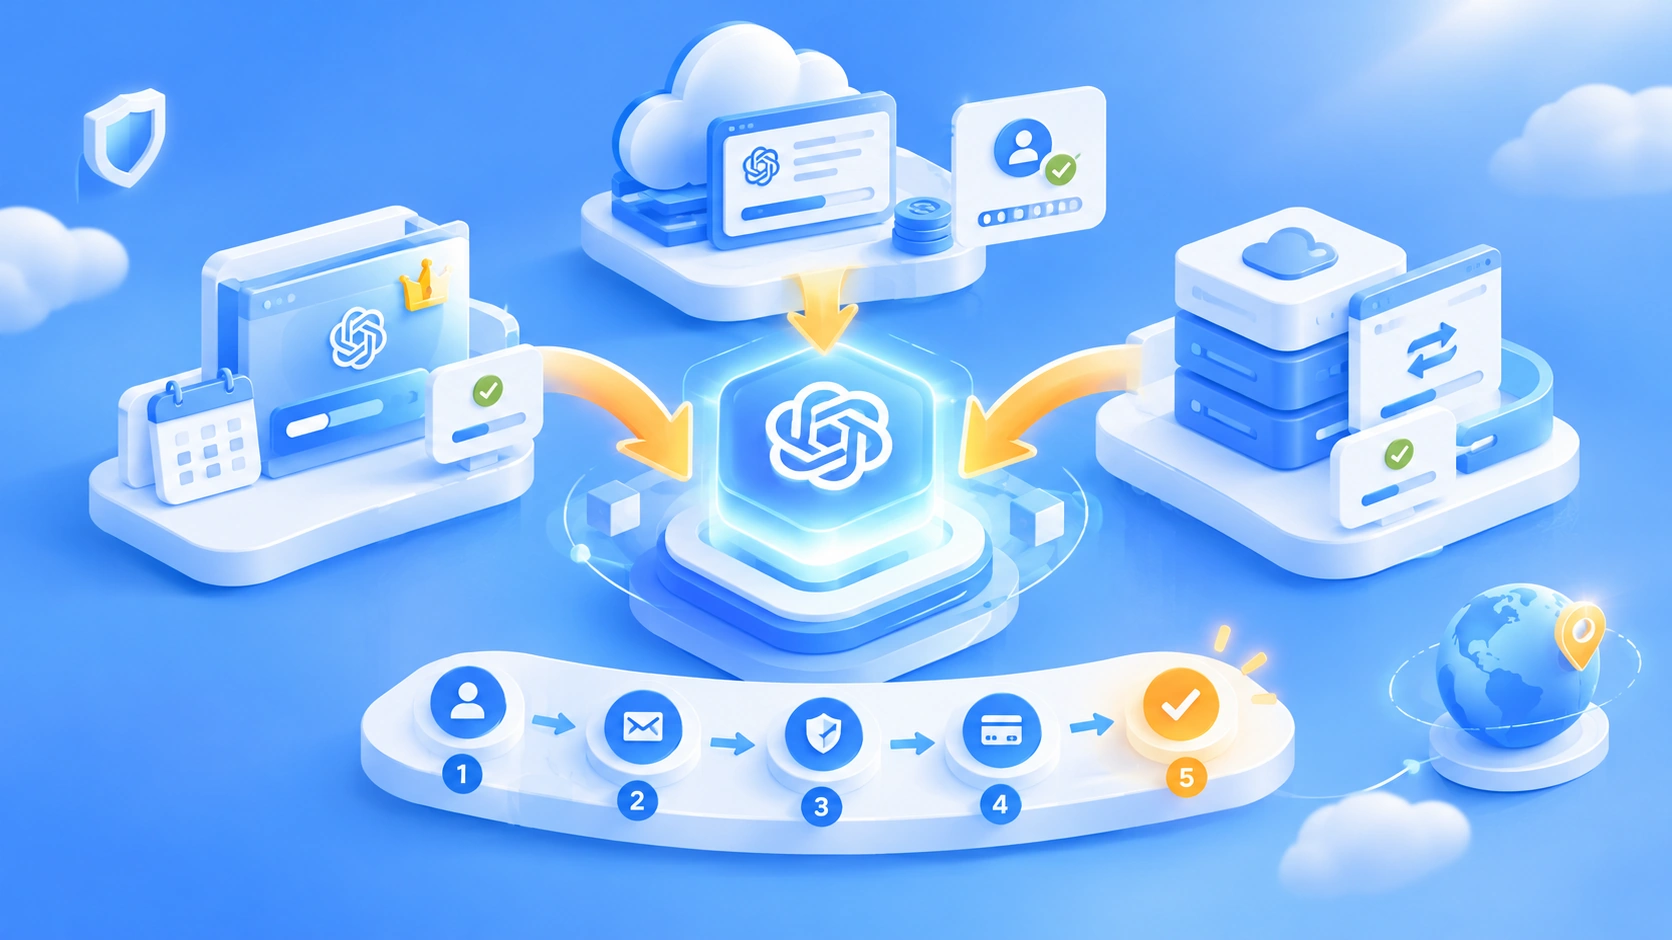
Author’s note: For indie developers — a plan for multi-model integration in a one-person AI Agent and Workflow project, structured around five stages: task tiering, a unified interface, routing and fallback, cost control, and observability/evaluation.
When you’re building an AI product on your own, the thing that most often gets you stuck usually isn’t the prompt — it’s multi-model integration. Once you start planning an Agent and a Workflow, a few questions show up fast: which model do I pick, should I connect several providers at the same time, how do I manage keys, how do I keep the bill under control, and what do I do when one provider starts acting up. This article lays out a “task tiering + unified interface + routing fallback” approach to planning multi-model integration, so you can pull this off in a solo project in a way that’s both low-maintenance and extensible.
This isn’t a scaled-down version of a big-company architecture. Teams have dedicated people maintaining the gateway, monitoring, and financial reconciliation — a one-person project has none of that. Every suggestion below circles back to one principle: spend the least maintenance effort to buy enough flexibility.
Core value: By the end of this article, you’ll know how to tier models for your own AI Agent and Workflow, unify how you connect to them, design fallback chains, and see clearly how much every single call costs.
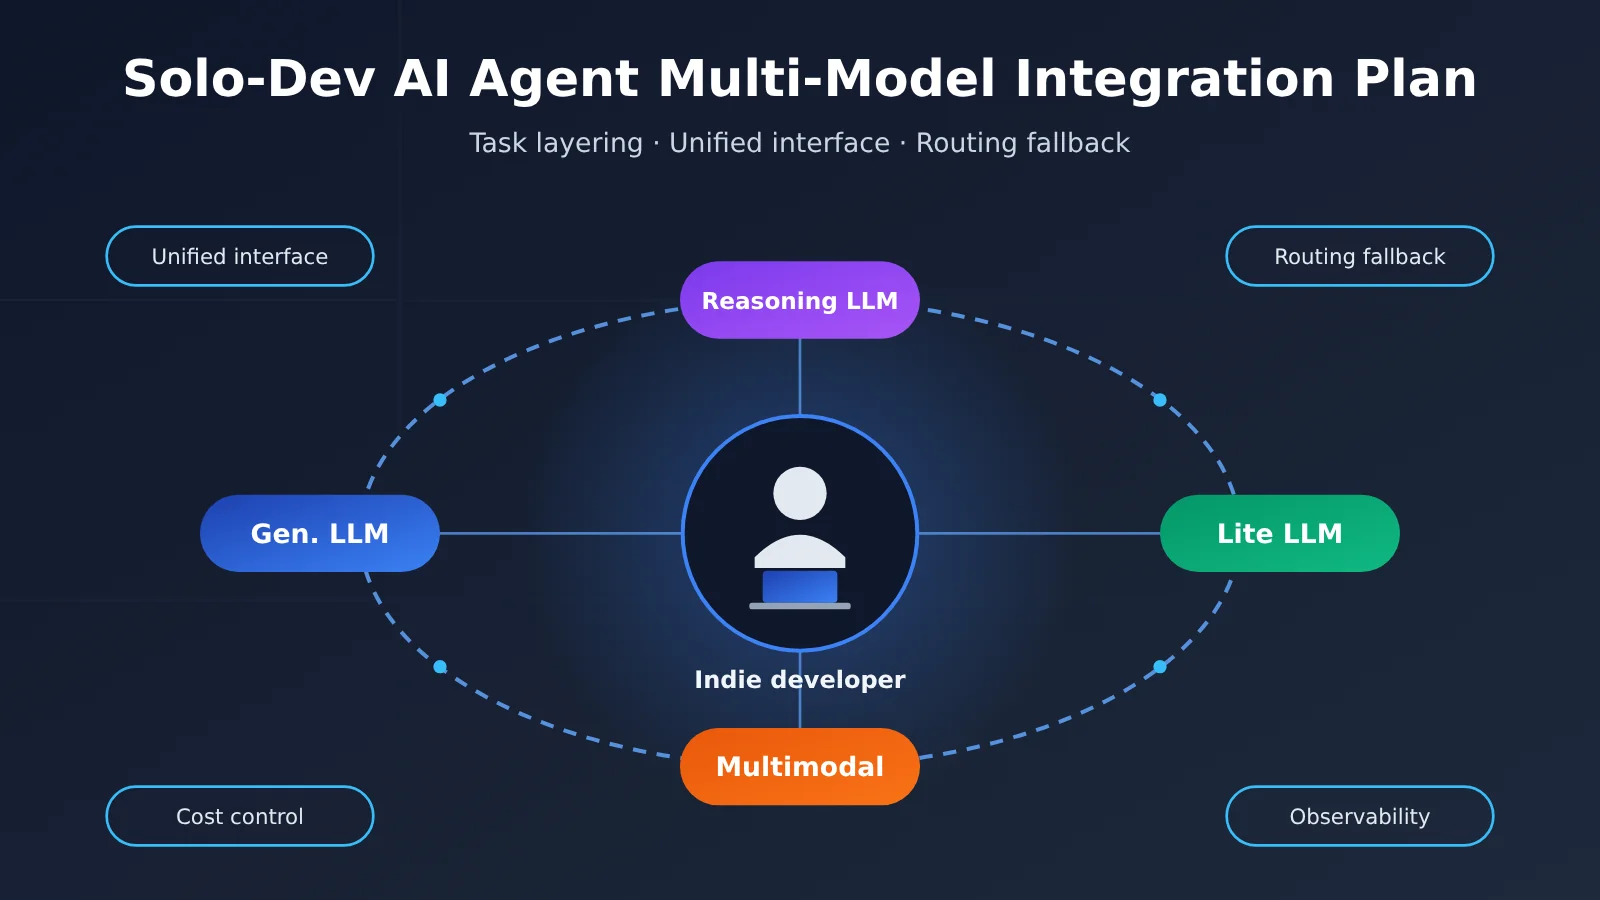
Key Points for Multi-Model Integration in a Solo AI Agent Project
Before you start writing code, think through the five points below. They determine whether, over the next three months, you’ll be iterating on the product or fixing the integration layer.
| Point | Description | Value for a solo project |
|---|---|---|
| Task tiering | Split calls in the Agent and Workflow into 3–4 tiers by difficulty and frequency | Expensive models are used only at critical steps, keeping overall cost manageable |
| Unified interface | Every model uses one request format, such as OpenAI-compatible | Switching models changes one parameter, with no need to rewrite business code |
| Routing and fallback | Configure a primary and backup model for each tier | If a single service has an outage, the product doesn’t go completely down |
| Cost accounting | Distinguish billing items such as input, output, and cache; use the platform’s pricing page as the source of truth | Avoid month-end bill surprises |
| Observability and evaluation | Record the model, latency, Token usage, and result quality for each call | Use data to decide whether to switch models, not gut feeling |
Key Details of Multi-Model Integration Planning
Task tiering is the starting point for the whole plan. A typical AI Agent does many different kinds of work: understanding user intent, planning steps, calling tools, summarizing results, and formatting output. These steps have very different requirements for model capability. Lightweight models are usually enough for tasks like intent classification and field extraction; multi-step planning, complex code generation, and long-document reasoning need flagship models. If you use the strongest model for the whole flow, cost and latency will rise sharply; if you go the other way and use lightweight models everywhere, critical steps are more likely to fail. Tier first, then choose models — that’s the most cost-effective approach for a solo project.
A unified interface determines your maintenance cost. Official SDKs from different model providers don’t fully agree on parameter names, streaming response formats, or tool-calling structures. Connecting directly to three or four official APIs at the same time means maintaining three or four sets of adapter code, three or four accounts, and three or four bills. For one person, that energy should go into the product. A more practical approach is to choose an aggregation layer that’s compatible with OpenAI and Anthropic formats; the business side only needs to speak one protocol, and models become swappable configuration items.
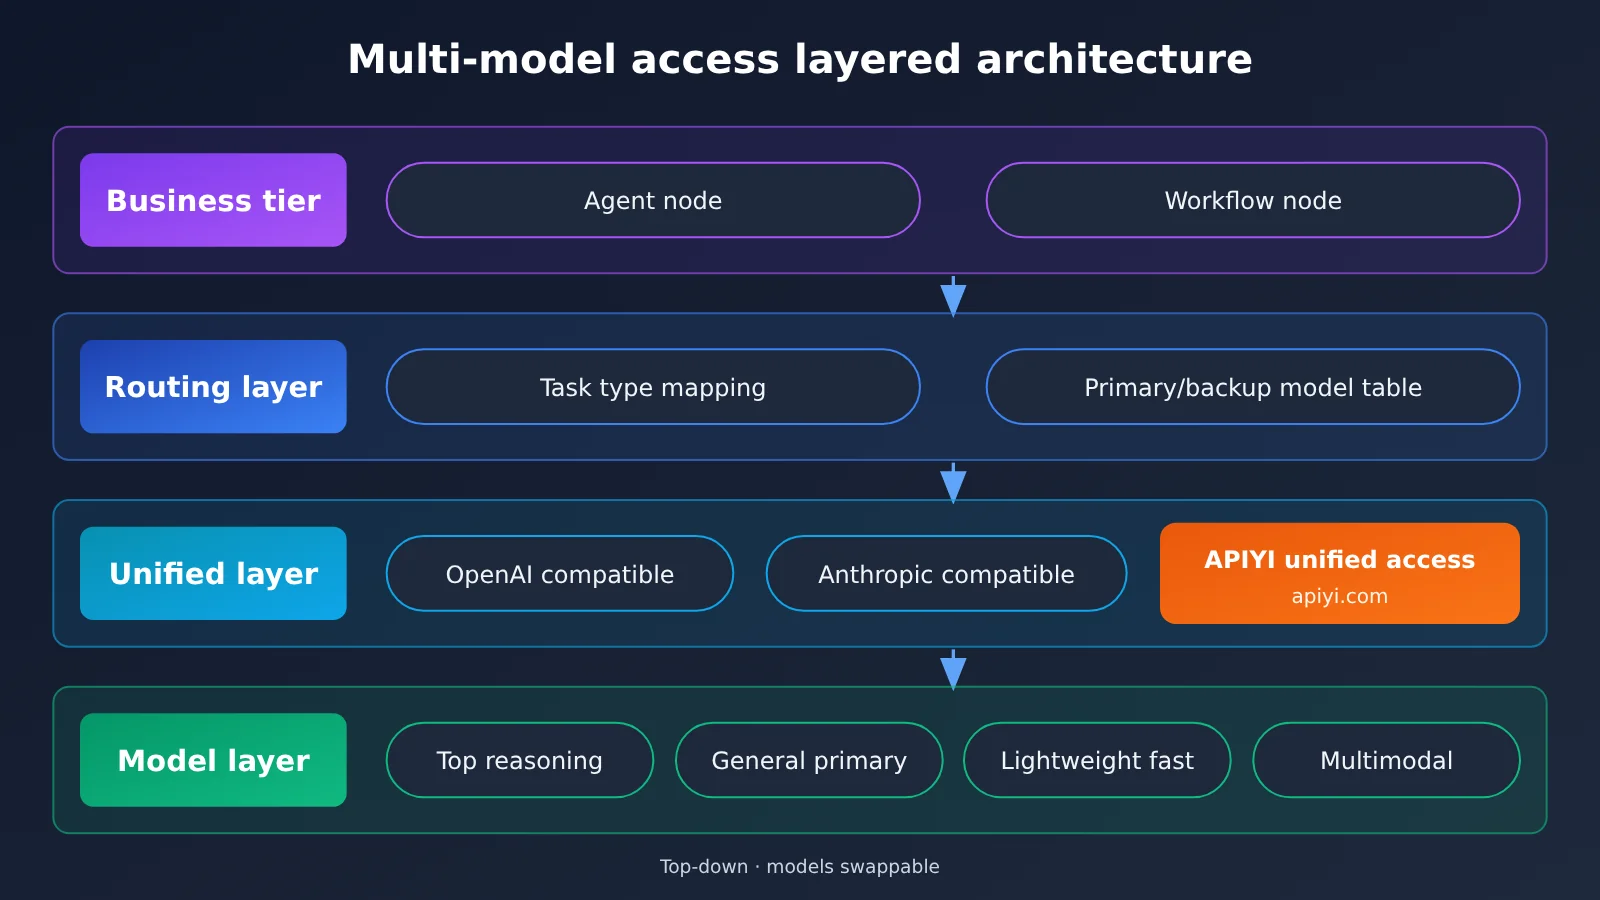
How a One-Person Project’s AI Agent Should Choose Models by Task Layer
The key to layering is to divide by task characteristics, not by model names. Below is a four-layer breakdown that works for most AI Agents and workflows. You can use it directly as a starting point and adjust it to fit your own business.
| Layer | Typical tasks | Model capability requirements | Selection approach |
|---|---|---|---|
| L1 Reasoning layer | Multi-step planning, complex code, long-document analysis | Deep reasoning, strong instruction following, long context | Flagship or reasoning models from each vendor, low invocation frequency |
| L2 Main layer | Routine conversation, content generation, tool calling | Balanced overall capability, stable tool calling | Mainstream general-purpose models, handling most of the traffic |
| L3 Lightweight layer | Intent classification, field extraction, summarization, rewriting | Fast, cheap, stable formatting | Lightweight or mini-tier models, high-frequency invocation |
| L4 Specialized layer | Image understanding, image generation, speech, vectorization | Modality-specific capabilities | Selected separately by function, decoupled from the text pipeline |
Three principles for putting layering into practice in a one-person workflow
Drawing up the layering table isn’t hard — the hard part is actually enforcing it inside your workflow. These three principles can help you avoid some detours:
- Default downward, promote only after verification. When you add a new node, first try running it with an L3 lightweight model. If the results don’t meet the bar, upgrade to L2 or L1. This keeps you from habitually reaching for the most expensive model for everything.
- Separate planning from execution. Let L1 handle the “figure out what to do” part of the Agent, and let L2 or L3 handle the “actually do it” part. Many Agent frameworks support configuring different models for the planner and the executor — this is the single highest-value optimization you can make.
- For structured output, prioritize models with stable formatting. Downstream steps in a workflow often need to parse JSON, and a model occasionally spitting out extra text can break the entire pipeline. For these nodes, judge by formatting stability, not just by how “smart” the model is.
One caveat: model versions iterate fast, so the table above deliberately doesn’t lock in specific model IDs. The safer approach is to pick 2–3 candidates for each layer from the model list of the platform you’re using, then run them against your own real samples before deciding. APIYI’s model list covers text, reasoning, and multimodal models from major vendors, so you can do side-by-side comparisons within a single account — well suited for a one-person project’s model selection testing.
Quick Start: Multi-Model Integration in a One-Person Project Workflow
This section walks through the implementation steps in order. For readability, all configuration items are explained with tables and prose rather than code.
Step 1: Choose a Unified Access Protocol
We recommend standardizing on the OpenAI-compatible Chat Completions format across your business logic. Mainstream Agent frameworks, Workflow orchestration tools, and most open-source projects support this format by default, giving you the best ecosystem compatibility. If you lean heavily on Claude-specific features—like native tool-calling structures or prompt caching—you can also use the Anthropic Messages format on the relevant nodes. APIYI is compatible with both the OpenAI and Anthropic interface formats, so the two protocols can share a single account and one API key.
Step 2: Turn Model Parameters into Configuration
Don’t hardcode model names in your business logic. All model-related parameters should be extracted into config files or environment variables. The table below lists the configuration items worth extracting:
| Config item | Purpose | Recommendation |
|---|---|---|
base_url |
API endpoint address | Fill in the endpoint given in the APIYI docs at docs.apiyi.com; keep it in one place across the whole project |
api_key |
Authentication key | Put it in an environment variable; use different keys for development and production |
model |
Model name | Name by tier, such as MODEL_L1, MODEL_L2, MODEL_L3 |
fallback_model |
Fallback model | Configure at least one per tier, ideally from a different vendor |
timeout |
Timeout | Set shorter for L3, longer for L1, so reasoning models aren’t wrongly timed out |
max_tokens |
Output cap | Set per node to prevent abnormally long outputs from driving up costs |
Once this is in place, switching models only requires editing the configuration—no changes to your Agent logic or Workflow orchestration.
Step 3: Label Tiers on Workflow Nodes
Open your Workflow orchestration diagram and label each model-calling node from L1 to L4. Whether you’re using a visual orchestration tool or your own flow code, you can note the tier in the node description or parameters, then read the corresponding model from the configuration. This step takes minutes but lets you see at a glance which nodes account for most of the cost.
Step 4: Configure Fallback and Retry
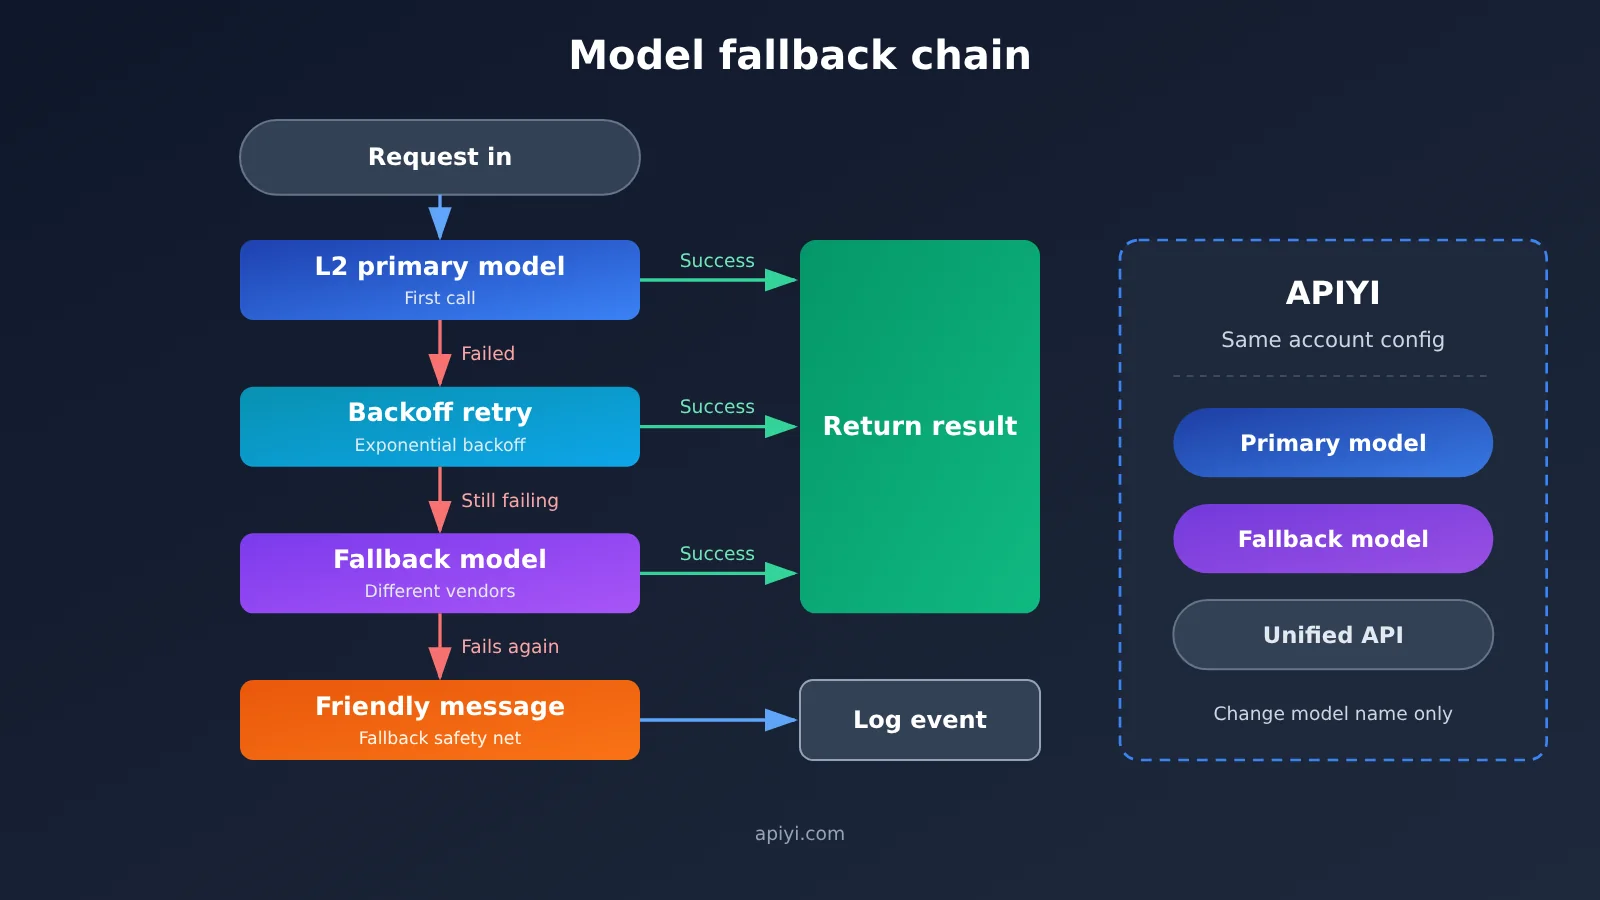
For each tier, configure a “primary model → fallback model” order. When the primary model returns a rate limit, timeout, or server error, do one or two backoff retries first, and switch to the fallback if it still fails. Try to pick the fallback from a different vendor at the same tier, so you avoid concentrated outages from a single provider.
Step 5: Log Every Call
Log at least these fields: timestamp, node name, tier, model name, input tokens, output tokens, latency, whether a fallback was triggered, and whether the call ultimately succeeded. A simple log table or a lightweight observability tool is enough—the key is to keep logging consistently.
🚀 Quick-start tip: For a one-person project, start by signing up at APIYI apiyi.com and getting test credits. Use the same API key to run real samples through each candidate model at L1 to L3. Lock in your choices before writing them into configuration—that’s much less work than wiring things up first and repeatedly changing code later.
Comparing Multi-Model AI Agent Integration Options for a One-Person Project
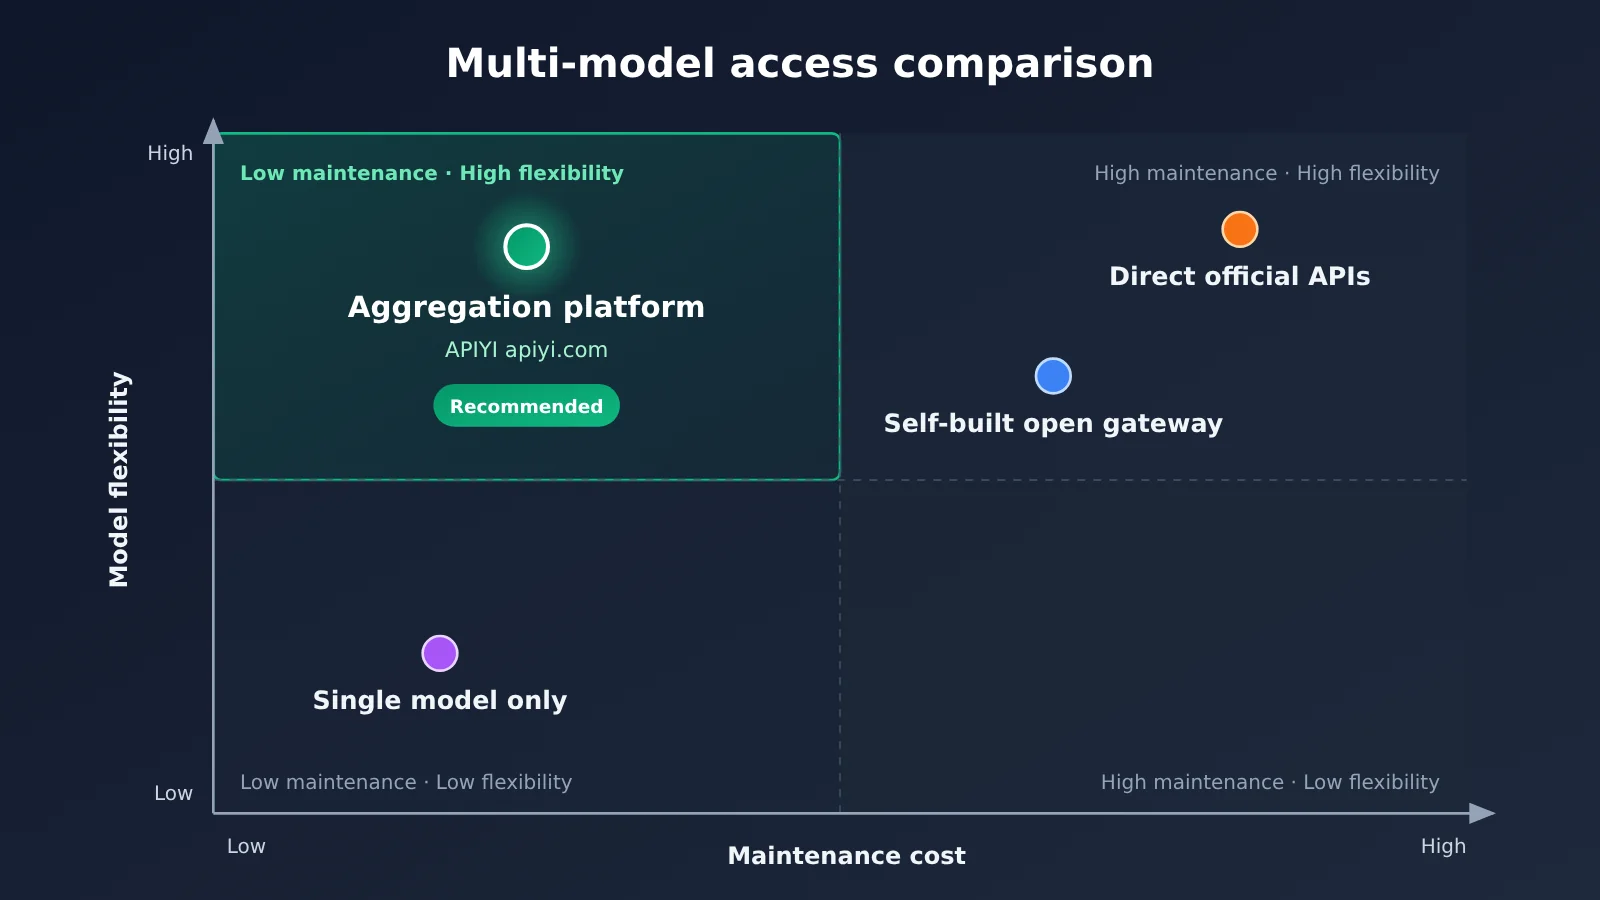
There are roughly four ways to integrate multiple models, and their maintenance costs vary enormously.
| Option | Core characteristics | When it fits | Maintenance burden for a one-person project |
|---|---|---|---|
| Single model only | One provider, one model — the simplest | Prototype validation, small tools with a single function | Low, but no fallback options |
| Direct connection to multiple official providers | Integrate each vendor’s official API separately | Deep reliance on one vendor’s specific features | High — needs multiple SDKs, accounts, and billing |
| Self-hosted open-source gateway | Deploy your own unified proxy layer | You have ops experience and need private deployment | Medium to high — you handle deployment, upgrades, and troubleshooting |
| Aggregated access platform | One interface for multiple models | You need multiple models but don’t want to maintain the integration layer | Low — platforms like APIYI apiyi.com provide a unified interface |
Benchmark Analysis of Multi-Model Integration Options
Single-model option benchmark: Using just one model is the most efficient approach early on — no routing design needed at all. But it bets both availability and cost entirely on one provider, so if that provider rate-limits you or changes prices, you have almost no room to maneuver. By contrast, setting aside a unified interface and configurable model parameters ahead of time adds nearly no development work, yet leaves plenty of room for later expansion.
Direct official connection benchmark: Connecting directly to official APIs has an edge in how fast you can adopt new features — you can use a capability the moment a vendor ships it. But maintaining multiple sets of adapter code, multiple top-up accounts, and multiple reconciliations drains one person’s energy continuously. For most one-person projects, a more realistic approach is to connect directly only at the points where you genuinely depend on a vendor-exclusive feature, and route everything else through a unified interface.
Self-hosted gateway benchmark: A self-hosted open-source gateway gives you the most control and suits scenarios that require private deployment. But deployment, upgrades, monitoring, and troubleshooting are all on you — it’s effectively one more service to maintain. If your core goal is to ship the product as fast as possible, an aggregated access platform is usually the safer starting point; once your business scales up, you can revisit whether to self-host.
💡 Recommendation: If you’re still on the fence, start by using APIYI to get all your nodes running, while keeping the business side dependent only on the OpenAI-compatible format. That way, even if you later migrate to a self-hosted gateway or direct official connections, the changes stay confined to the configuration layer.
Cost and Stability Control for Multi-Model Integration in Solo Projects
Solo projects don’t have a finance colleague keeping an eye on the bill, so cost control has to be built into the architecture. This table summarizes the most common cost levers:
| Cost lever | Approach | Billing notes |
|---|---|---|
| Tiered downgrading | Use L3 lightweight models for high-frequency nodes | Unit prices vary noticeably across models; refer to the APIYI pricing page |
| Control output length | Set max_tokens for each node |
For most models, output unit price is higher than input; refer to the pricing page for specifics |
| Use caching | Put fixed system prompts and tool definitions at the front of the request | Whether caching is supported and how cache billing works vary by model; refer to the pricing page |
| Compress context | Periodically summarize agent multi-turn conversations; don’t let history accumulate indefinitely | Input tokens grow linearly with each turn, which is a major hidden cost |
| Set budget alerts | Track daily token usage and notify when a threshold is exceeded | Cross-check against invocation logs and platform billing |
On pricing, this article deliberately does not list any specific numbers. Input unit prices, output unit prices, cache read/write prices, and billing rules all change with vendor policy, and estimating from memory or old materials is easy to get wrong. When planning costs, use the actual data on the APIYI pricing page at docs.apiyi.com/models. Estimate monthly cost using this approach: “daily invocation count per tier × average input tokens × input unit price + average output tokens × output unit price,” and reserve a separate column for cache hit scenarios.
On stability, there are three things worth completing before launch:
- Failover path drill: Manually change the primary model name to an invalid value, and confirm that Workflow can automatically switch to the fallback model and complete normally.
- Tiered timeouts: Reasoning models take longer to think, so their timeout thresholds should be significantly higher than those for lightweight models. Otherwise, you’ll run into the “the smarter it is, the more likely it is to time out” problem.
- Idempotent design: Tool calls with side effects, such as sending emails or writing to a database, must be prevented from executing repeatedly during retries.
FAQ
Q1: What is multi-model integration planning for a one-person project?
It means deciding up front, in a solo development setting, which parts of your AI Agent and Workflow use which type of model, how they connect through which interface, how to fall back when something breaks, and how to track costs. The goal is to gain both cost advantages and availability guarantees without adding too much maintenance burden.
Q2: What’s the difference between AI Agents and Workflows when it comes to model integration?
Workflow steps are pre-orchestrated, so the model for each node can be statically assigned, and layering is fairly intuitive. Agents decide their own call order and number of calls, making call volume hard to predict — so you need to split planning and execution across different models, and set a maximum number of rounds and a Token budget per task.
Q3: Do I need to integrate multiple models right from the start?
You don’t have to connect many providers at the beginning, but the interface design should be unified from day one. It’s a good idea to make the model name configurable in your first version, use the OpenAI-compatible format, and reserve a backup model for core nodes. That adds very little development work but makes future expansion much smoother.
Q4: Which one-person project scenarios are best suited to multi-model integration?
– **AI writing or content tools**: outlines on L1, main text on L2, title rewriting on L3.
– **Intelligent customer service Agents**: intent recognition on L3, complex issues escalated to L2 or L1.
– **Data processing Workflows**: batch extraction and classification on L3, anomalous samples reviewed by L2.
– **Coding assistant tools**: code planning on L1, completion and comments on L2 or L3.
Q5: How can I quickly call multiple models through a unified interface?
You can use APIYI, which is compatible with both the OpenAI and Anthropic API formats:
1. Visit APIYI at apiyi.com to register an account and get an API key.
2. Configure `base_url` and the key according to the APIYI docs at docs.apiyi.com.
3. Change the `model` parameter to switch between models from different providers — no changes needed to your business code.
The reasoning models, general-purpose models, lightweight models, and multimodal models covered in this article can all be invoked and compared through APIYI’s unified interface.
Q6: How do I estimate the monthly cost of a multi-model setup?
Start by pulling from your call logs the average daily call count and average Token count for each layer, then calculate against the input, output, and cache unit prices for each model on the APIYI pricing page at docs.apiyi.com/models. Don’t rely on prices from old articles or memory — use the actual data on the pricing page, and re-check once a month.
Q7: What are the known limitations of a multi-model setup?
Different models respond to the same prompt in different styles, so after switching to a backup model, output formats may differ slightly, and downstream parsing needs to be fault-tolerant. Some providers’ proprietary features may not be fully available under a compatible format. Also, the more models you have, the more evaluation work there is — it’s best to keep candidate models to two or three per layer.
Key Takeaways: Multi-Model Integration for a Solo-Developer AI Agent Project
- Layer first, then pick models: Split tasks by difficulty and frequency into L1 through L4 — not by model name.
- Unify the interface: The business side should depend on just one protocol, with model names as swappable config items.
- Separate planning from execution: Use a strong model for Agent planning, then hand execution off to a workhorse or lightweight model.
- Rehearse your fallbacks: Primary and backup models should come from different vendors; simulate a failure manually before launch to verify.
- Prices come from the pricing page: Check every unit price and cache billing detail against docs.apiyi.com/models.
- Logs are your decision-making basis: Record model, tokens, latency, and fallback events, then use that data to decide when to switch models.
- An aggregation platform is a solid starting point: APIYI is compatible with both OpenAI and Anthropic formats, so a single key lets you test multiple models.
Summary
When you’re building AI Agents and Workflows as a one-person project, planning for multi-model integration boils down to three things:
- Task layering: Give each step a model that’s just good enough, so both cost and quality stay under control.
- A unified interface plus configuration: Models become swappable parameters, keeping the maintenance burden within what one person can realistically handle.
- Fallbacks and observability: Availability has a safety net and decisions have data behind them — that’s how a project keeps iterating steadily over the long run.
A good approach is to get every node running through one unified interface first, then refine model selection layer by layer based on your log data. If you’d rather not maintain the integration layer yourself, you can call mainstream models through APIYI at apiyi.com, with interfaces compatible with OpenAI and Anthropic formats. For integration details, see the APIYI docs at docs.apiyi.com; model prices and billing rules are governed by the pricing page at docs.apiyi.com/models.
📚 References
- APIYI Documentation Center: Endpoints, authentication methods, and API format specifications
- Link:
docs.apiyi.com -
Description: Check this when configuring
base_url, your Key, or switching between OpenAI and Anthropic formats -
APIYI Models and Pricing Page: Model list, input/output unit prices, and cache billing
- Link:
docs.apiyi.com/models -
Description: All cost-related figures in this article are based on the actual data on this page
-
OpenAI API Documentation: Chat Completions API format reference
- Link:
platform.openai.com/docs -
Description: Learn about the parameters and tool-calling structure of the OpenAI-compatible format
-
Anthropic Official Documentation: Messages API and prompt caching notes
- Link:
docs.anthropic.com - Description: Check this when using the Anthropic format on Claude nodes
Author: APIYI Technical Team
Technical Discussion: Feel free to reach out to us on the APIYI homepage — for more integration resources, visit the docs.apiyi.com documentation center