
At 00:22 (UTC+8) on 2026-11-10, APIYI issued a recovery notice: The grace period remains in effect through 2027-12-31 23:59 (UTC+8). You can now log in to the console and bind a Passkey and 2FA right away—there’s no need to wait 72 hours. The old system tokens are only scheduled to be deactivated on 2026-11-11 (UTC+8). The platform says it will decide whether to extend the deadline based on usage. As of 2026-11-10, there’s been no new notice saying they’ve “already been deactivated” or “extended.”
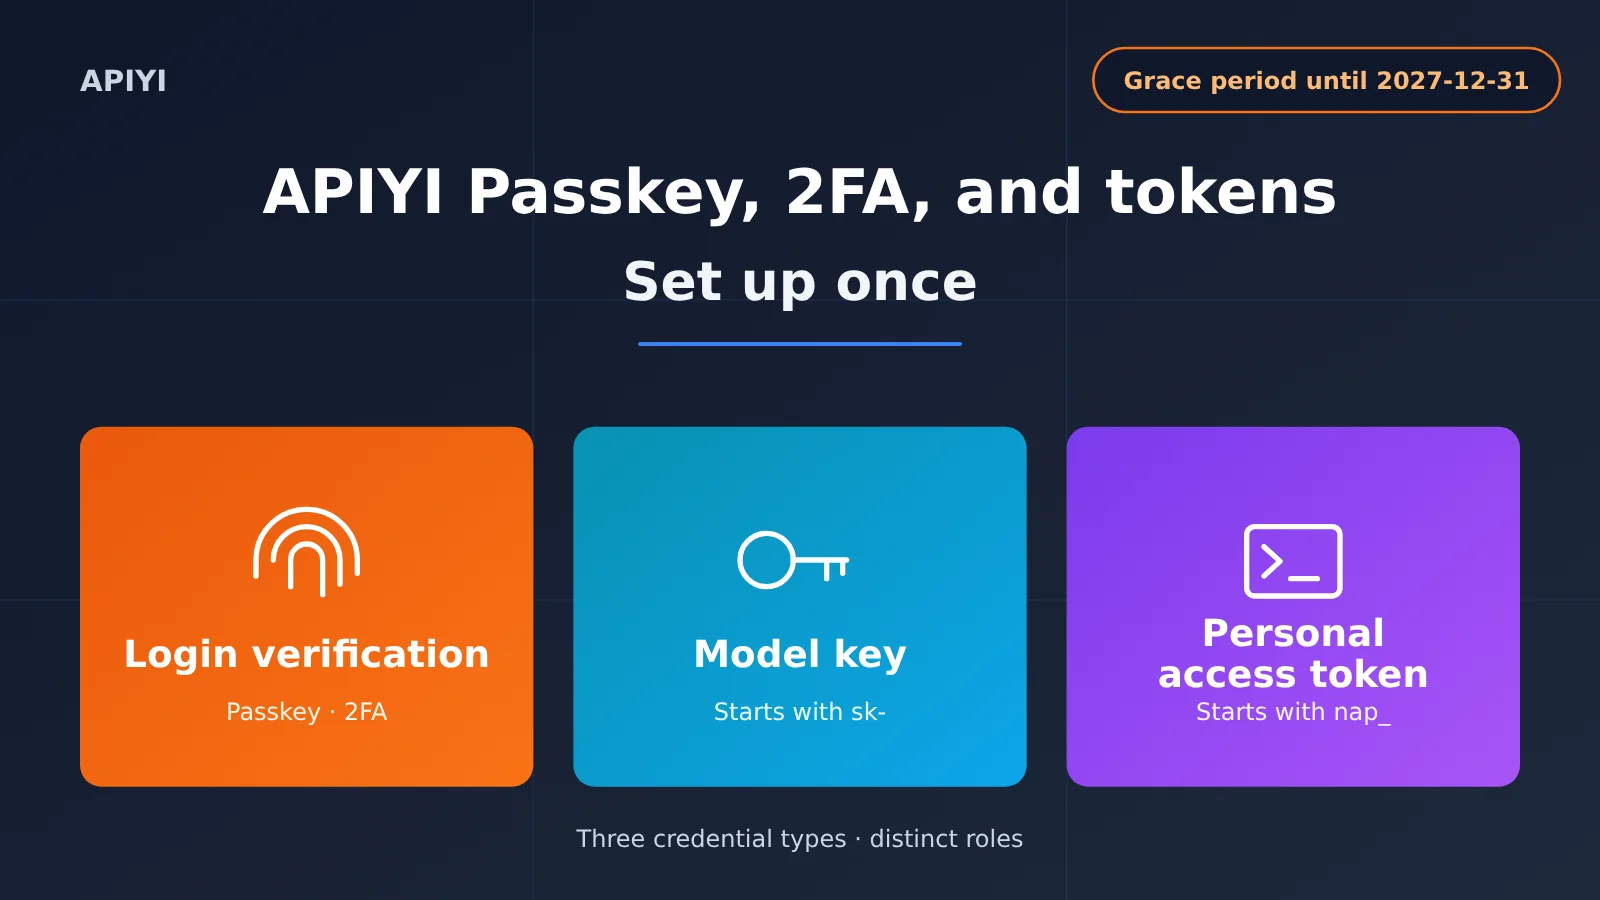
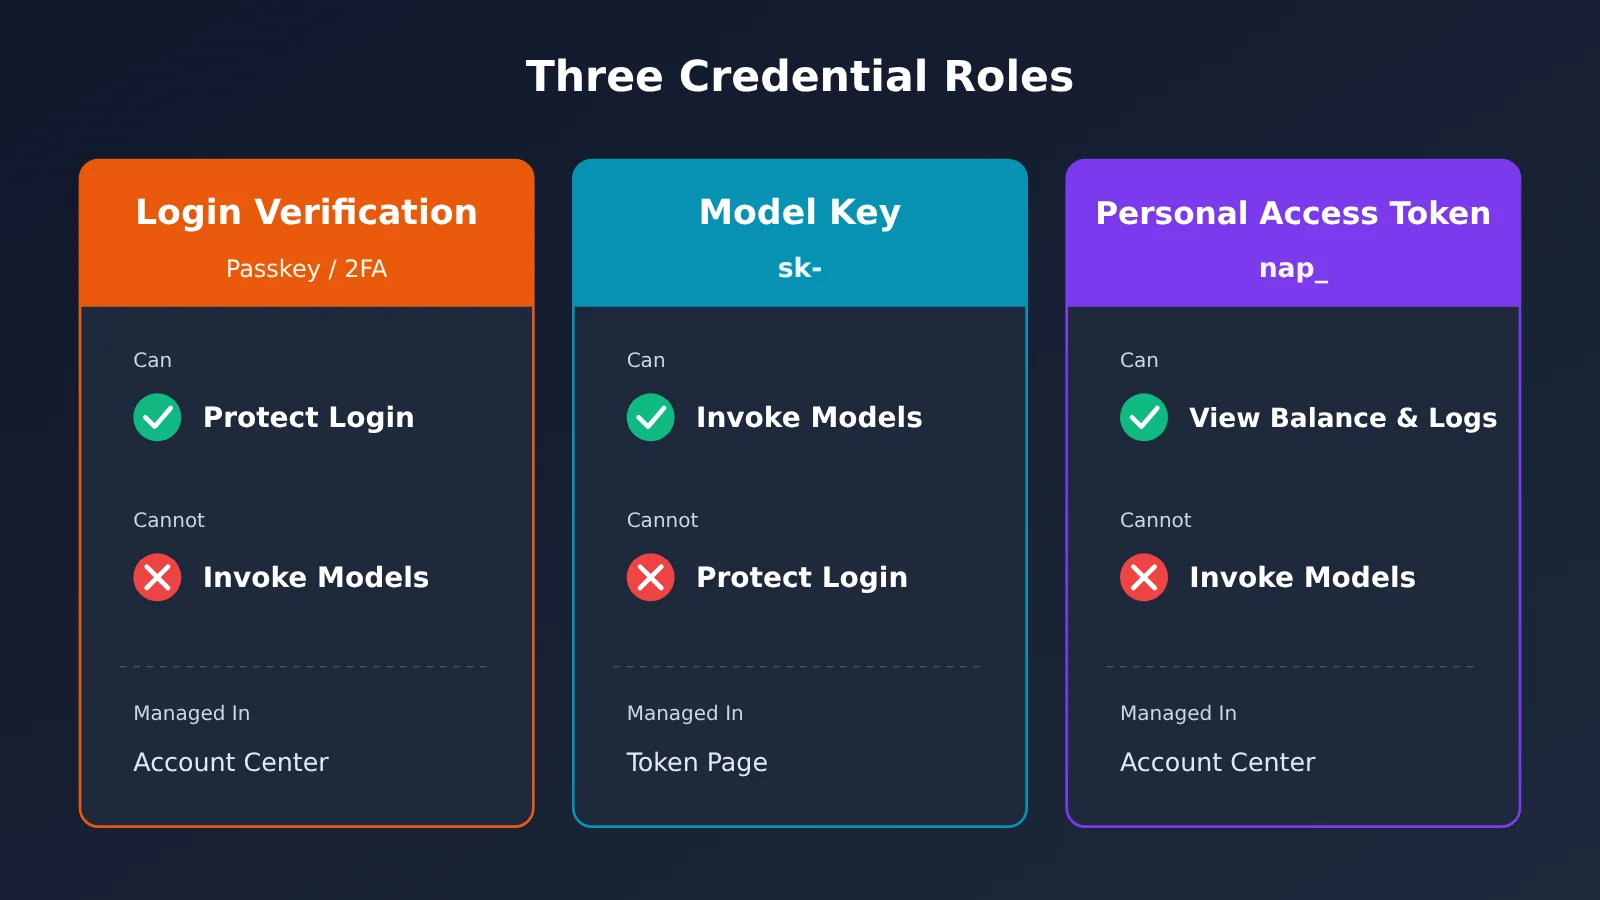
Before you get started, make sure you understand the difference between these three types of credentials so you don’t go wrong in the steps that follow. Use a password, Passkey, and 2FA to log in to the website; use a model key that starts with sk- to invoke models; and use a personal access token that starts with nap_ to check your balance and logs or manage keys from scripts. These credentials aren’t interchangeable. This guide walks you through setting each one up, following the order of the pages in the personal center.
APIYI Passkeys, 2FA, and Tokens: The Essentials
The table below is the foundation for this guide. Whenever you run into a problem, come back here first to check which credential you’re using.
| Credential | What it looks like | What it can do | What it can’t do | Where to manage it |
|---|---|---|---|---|
| Sign-in verification (password, Passkey, 2FA, GitHub) | Fingerprint, face scan, device passcode, or 6-digit code | Protects console sign-in and verifies your identity again for sensitive actions such as exports | Can’t call models or access management APIs | Personal Center |
| Model key (API key) | Starts with sk- |
Calls models such as OpenAI, Claude, and Gemini | Can’t protect sign-in; if it’s leaked, 2FA won’t stop it from being used | Tokens page |
| Personal access token | Starts with nap_ |
Lets scripts check your balance and logs, and manage model keys | Can’t call models or change your password or 2FA settings | Personal Center → Account Options |
Go to the Personal Center at https://api.apiyi.com/account/profile, or open it by clicking “Personal Center” in the website’s top-right corner or left-hand navigation. Start all the setup and token-creation steps in this guide from that page.
Still Being Told to Wait 72 Hours? What APIYI Passkeys and 2FA Mean Now
The 72-hour rule hasn’t been canceled; enforcement is simply paused during the grace period. To avoid treating assumptions as confirmed facts, the details below are grouped into four categories: official documentation, platform notices, a summary of the recommended steps, and information the documentation doesn’t cover.
| Information type | Details |
|---|---|
| Original official rule | Accounts that sign in with a password only must remain stable for 72 hours in the same login session and environment before they can bind a verification method for the first time. Switching networks restarts the wait. |
| Platform notice (10-04) | From now through 2027-12-31 23:59 (UTC+8), binding is allowed immediately after login during the grace period. High-risk logins are still blocked under the original rules. |
| Platform notice (11-10) | After the server switch on November 6, the grace-period policy briefly didn’t take effect in the new environment. It has now been restored. |
| After the grace period | The original rule will return. In a new environment, accounts that sign in with a password only must remain stable for 72 hours before adding a verification method. This won’t affect methods that are already bound. |
| Not covered in the documentation | The documentation doesn’t say exactly how high-risk logins will be blocked after the grace period, and no follow-up notice has been issued. |
If you saw a “please wait” message after November 6, it was caused by the server switch—not a problem with your account. Refresh the page and try again. There’s still more than a year left in the grace period, but we recommend binding a method today. That way, you won’t run into the 72-hour wait when signing in from a new environment after the end of 2027.
🎯 Recommendation: Binding is done while you’re already signed in and only adds another verification method. It doesn’t affect your balance, model keys, or call history. Your APIYI API calls won’t be interrupted during the process.
In What Order Should You Set Up Passkey and 2FA on APIYI?
The recommended order is to set up Passkey first, then set up 2FA as a backup. Reversing the order can cause a snag, which we’ll cover in the next section.
Step 1: Set Up Your APIYI Passkey
Open your account page, scroll to Account options at the bottom, and click Set up Passkey. A system dialog will appear asking where you’d like to save the passkey for apiyi.com. First, make sure the domain shown in the dialog is correct. If it isn’t, don’t continue.
After choosing where to save it, confirm with your fingerprint, face scan, or screen lock password. When setup is complete, the button will change to Remove Passkey, and the time it was last used will appear next to it. The next time you open the login page, you can choose to sign in with your Passkey.
Where you save it determines whether you can use the key across devices. Use the table below to choose the right option:
| Save location | Best for | Syncing |
|---|---|---|
| iCloud Keychain | Mac, iPhone, and iPad | Syncs across your Apple devices |
| Google Password Manager | Chrome and Android | Syncs across devices |
| Phone, tablet, or security key | Temporary sign-in on someone else’s computer: scan the QR code on the computer and verify on your phone | The key stays on your phone or security key |
| This browser profile | Using this machine only | Doesn’t sync; you’ll lose it if you switch computers or reinstall the operating system |
A few things to know about Passkey: it’s based on WebAuthn / FIDO2. The private key stays on your device or in your password manager; the server only stores a public key that can’t be used to derive the private key. Fingerprint and face checks happen locally and aren’t uploaded. Passkey can’t be used to register a new account, and it doesn’t replace your password. After setup, password and GitHub sign-in will still work as usual. Also, don’t set it up on a public computer.
Step 2: Set Up 2FA and Save Your Backup Codes Separately
Go to the 2FA section near the bottom of your account page. Scan the QR code with Google Authenticator, Microsoft Authenticator, or another TOTP-compatible authenticator app, then enter the six-digit code that refreshes every 30 seconds.
After setup, the page will show backup codes. Be sure to save them. If you switch phones, lose your device, or accidentally delete your authenticator app, you’ll need a backup code to sign in again. Don’t just save a screenshot on the same phone as your authenticator app. Store the codes in a password manager on another device, or write them down and keep them somewhere safe.
After setup, signing in to the website, creating an API key, exporting data, and other sensitive actions may require a 2FA code or Passkey verification. This is a normal security check, not an error.
What to Do If You Can’t Set Up a Passkey or 2FA on APIYI and See “Failed to Save Verification Status”
Issue 1: The page still says you need to wait
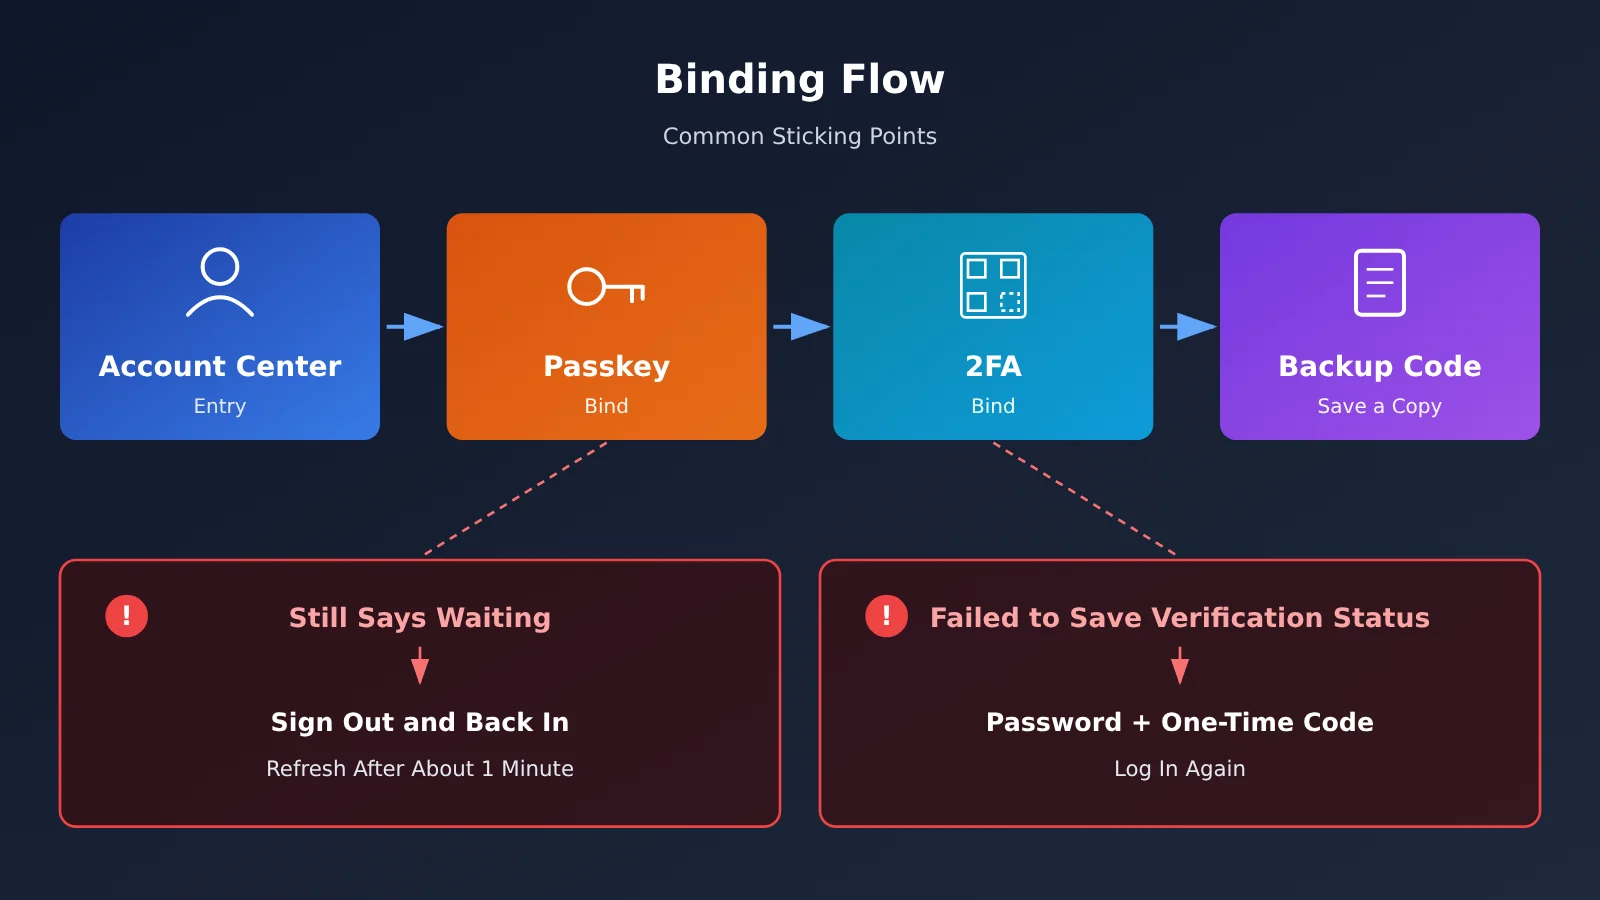
The grace period is applied per login session. Some sessions that were logged in earlier may have already been prompted to reverify, and won’t be automatically cleared. Repeatedly trying in the same session will just keep showing the wait message. Try these steps in order:
- Refresh the page and try again.
- If it still says to wait, log out and log back in to create a new session.
- Wait about a minute for the system to clear the restriction, then refresh the account settings page and try setting it up again.
- If it still doesn’t work, try the latest version of Chrome, Edge, or Safari, and make sure your device has a screen lock passcode or biometric authentication set up.
Some in-app browsers also don’t support WebAuthn. If tapping “Set up Passkey” doesn’t open a prompt, switch to your device’s default browser.
Issue 2: After setting up 2FA, you see “Failed to Save Verification Status” when setting up a Passkey
After you set up 2FA, the system requires you to reverify your current login session. If you continue and try to set up a Passkey, you may see “Failed to Save Verification Status.” To fix this, log out, sign in again with your password + 2FA code, then go to the bottom of your profile page and tap “Set up Passkey.”
If you signed up with one-click GitHub registration, sign in with GitHub—you don’t need to set a separate password. Whatever type of account you have, we recommend keeping a backup sign-in method, such as a password, your registered email, or GitHub. Don’t rely only on a Passkey stored on a single device.
💡 Tip: Setting up a Passkey changes your verification methods. The official documentation states: “Changing your password, two-step verification, or passkey will revoke all personal access tokens.” If your management scripts start returning 401 errors after setup, go to your profile page, create a new personal access token, and replace the old one. Model invocation won’t be affected.
How to Keep APIYI Model Keys, Personal Access Tokens, and Legacy System Tokens Separate
Model keys (sk-) are managed on the token page at https://api.apiyi.com/token. They’re used to invoke models, and you can create as many as you need. Personal access tokens (nap_) are managed under Account Settings in your profile and are used to call management APIs. Each account can have up to 20. Legacy system tokens are the old credentials for management APIs and will be replaced by personal access tokens.
| Comparison | Legacy system token | Personal access token |
|---|---|---|
| Permissions | Has all account permissions | Select permissions as needed; read, write, and view keys are separate |
| Quantity | 1 per account | Up to 20 |
| Expiration | Never expires | 30 days by default; choose 90, 180, or 365 days, set a custom duration, or never expire |
| IP allowlist | Not supported | Supports IPv4, IPv6, and CIDR; can’t be changed after creation |
| Prefix | No fixed prefix | nap_ |
| Status | Scheduled for deactivation starting 2026-11-11 (UTC+8) | Recommended |
Switch Your Management Scripts to an APIYI Personal Access Token
- Open your profile, go to Account Settings, and click Personal Access Tokens, then click Create Token in the upper-right corner.
- Give the token a name based on its purpose, such as “Reconciliation Script” or “Balance Monitor.” We recommend choosing a longer expiration period, such as 365 days.
- Leave the IP allowlist empty for now (an empty list means no restrictions), and select only the permissions your script needs.
- Click Create Token, then copy and save the token right away. Replace the old value in your script’s environment variables or configuration.
You don’t need to change the API endpoint or your code. The base URL is still https://api.apiyi.com. Set the Authorization header to the token itself; adding the Bearer prefix is optional.
Select permissions based on the API endpoints you use. Granting too many permissions only increases risk:
- Check your balance with
GET /api/user/self: select “Profile · Read.” - Query logs with
GET /api/log/self: select “Usage and Personal Records · Read.” - List or query model keys: select “Model Keys · Read.” To create, modify, or delete keys, select “Model Keys · Write.” To retrieve plaintext keys, select “Model Keys · View Keys.”
Note that write permission doesn’t include read access, and read permission doesn’t let you view plaintext keys. Operations such as changing your password or setting up two-step verification can’t be performed with a token, even if it has write permission. You’ll still need to sign in on the website.
Once your script is working, create a new production token with an IP allowlist. Add the public outbound IPs for your production server, backup server, and any other systems. Separate multiple addresses with commas. After switching to the production token, delete the test token that has no allowlist. Use a separate token for each script, so if one is leaked, you only need to delete that token.
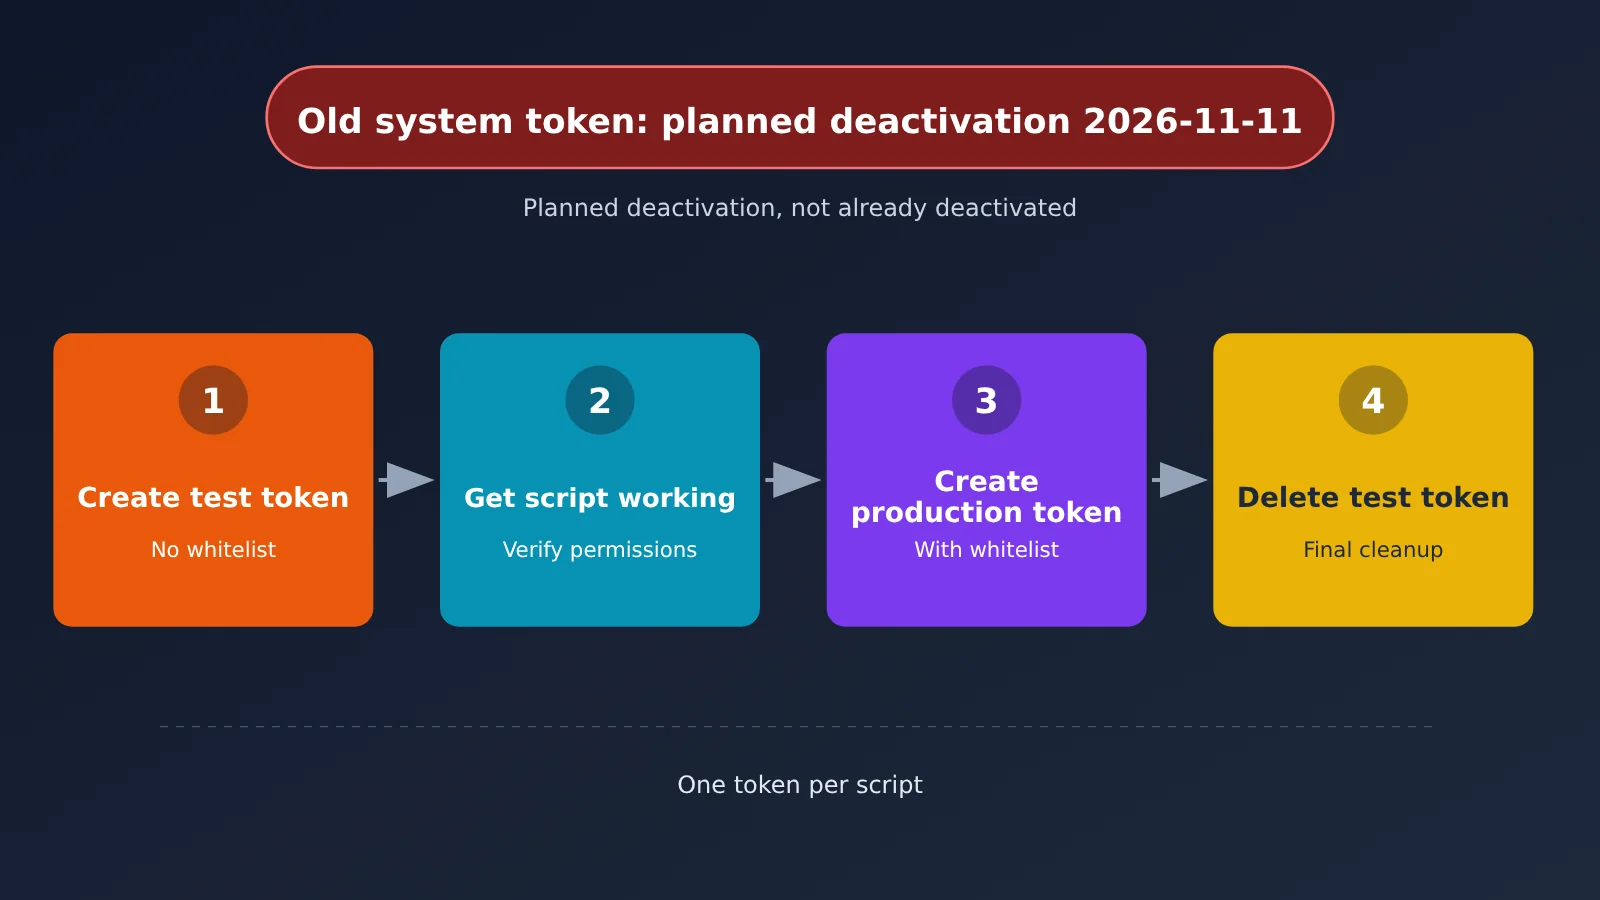
🚀 Migration recommendation: The safest approach is to switch over to APIYI before the scheduled deactivation date of 2026-11-11. The documentation has no further notice on whether deactivation will actually happen on that date or whether it might be postponed at short notice, so don’t count on an extension.
What to Do First If an APIYI Key Is Leaked or a Script Returns 401
Leaked model key: disable it first, then investigate
A model key’s maximum available quota is the account balance. If a key is leaked, first go to https://api.apiyi.com/token and delete or disable it. This is the only action that can immediately limit the damage, so do it before troubleshooting. Then create a new token: turn off unlimited quota, set an authorized quota, and, if needed, check “Enable advanced options” to configure an IP allowlist and permitted models. Update your application configuration with the new token. Finally, check the call logs for unfamiliar models, unusual call volumes, or activity at unexpected times, and remove the leaked key from code, documentation, screenshots, and chat records.
If you previously put a key in Railway and haven’t rotated it yet, disable the old key first, then create a replacement, update your environment variables, and redeploy. If you haven’t used Railway, you don’t need to rotate your key because of this notice.
Script returns 401 or 403: check the error message
| Status code | Message | Cause | What to do |
|---|---|---|---|
| 401 | ACCESS_TOKEN_LEGACY_RETIRED |
You’re still using a legacy system token that’s past its retirement date | Create a personal access token to replace it |
| 401 | This access token may not be used from the current IP address. |
The source IP isn’t on the allowlist | The allowlist can’t be changed; create a new token |
| 403 | ACCESS_TOKEN_SCOPE_DENIED |
The required permission isn’t enabled | Create a new token and enable the required permission |
| 401 | Message only says the token is invalid | The token has expired or been deleted, or you changed your password, two-factor authentication, or passkey | Create a new token in your account settings |
Preventing problems is much easier than fixing them afterward. Turn off unlimited quota for model keys used for testing, set a quota of $5 to $50, and configure an expiration date. Use separate keys for production and testing, never put real keys in code or Git, and use a placeholder like sk-your-api-key in screenshots.
Frequently Asked Questions
Q1: Can I still sign in with my password after setting up an APIYI Passkey or 2FA?
Yes. Two-step verification adds an extra layer of security; it doesn’t replace your password. GitHub sign-in also remains available. Some actions may require an additional verification code or Passkey.
Q2: What should I do if I lose my 2FA backup codes?
If you can still sign in, go to your account settings to set up 2FA again and save your new backup codes. If you’ve lost your backup codes and can’t sign in, contact [email protected]. They can help disable 2FA after verifying your identity.
Q3: Should I enable an IP allowlist for my personal access token on a home network?
Not recommended. The public IP address for a home broadband or office network can change, and an allowlist may cause requests to suddenly fail with a 401 error. Instead, use read-only permissions and set a shorter expiration time.
Q4: Can I use a personal access token to call models?
No. Continue using a model API key that starts with `sk-` to call models, and set `base_url` to `https://api.apiyi.com/v1`. The `nap_` token is only for balance, log, and token management endpoints.
Q5: I entered the wrong IP allowlist for my personal access token. Can I edit it?
No. You can’t modify a personal access token’s IP allowlist after creating it. Create a new token, then delete the old one. Model API keys have a separate allowlist setting, which you can temporarily clear and then restore. Be careful not to confuse the two.
Q6: Will my Passkey still be available if I get a new phone?
It depends on where it’s stored. Passkeys saved in iCloud Keychain or Google Password Manager will sync; those stored only in a local browser profile won’t. If you lose your device, sign in with your password or GitHub, remove the old Passkey, and set one up on your new device.
Summary: Get These Four Things Done Today
- Add a Passkey: Go to Account options at the bottom of your profile page → Add a Passkey. Choose a storage option that syncs across your devices if possible.
- Set up 2FA and save your backup codes elsewhere: Don’t keep your backup codes only on the phone with your authenticator app.
- Turn off unlimited quotas for test tokens: Set a low usage limit for your test model key on the token page.
- Switch management scripts to a personal access token: Replace your old system token with a
nap_token before the planned deprecation date of 2026-11-11.
All four steps start at https://api.apiyi.com/account/profile and take just a few minutes. Once you’re done, use separate credentials for login, model invocations, and management scripts. If one credential is compromised, you’ll only need to deal with that one.
Author: APIYI Technical Team
More resources: For more information about accounts and tokens, see the Account Security and Personal Access Token FAQs in the docs center at docs.apiyi.com.