Many developers, when first integrating the gpt-image-2 image editing API, instinctively POST the original image directly—after all, the official documentation clearly states a 50MB limit, so why not use it? However, after running a few dozen tests, you'll quickly realize that compared to a 1.5MB compressed image, uploading a 20MB original can result in generation speeds that are over three times slower, with failure rates (especially 413 Request Entity Too Large errors) increasing exponentially.
Based on extensive real-world experience, this article provides 5 best practices for gpt-image-2 image uploads, focusing on the two pitfalls developers encounter most often: what is the ideal image compression size, and what actually determines the output resolution.
🎯 Key Takeaway First: It is recommended to keep individual image uploads for gpt-image-2 under 1.5MB. The output resolution is determined by the
sizeparameter; writing "8K" or "4K" in your prompt is completely useless. All code in this article can be run directly via the APIYI (apiyi.com) API proxy service, without requiring an overseas network environment.
{5 best practices for gpt-image-2 image upload}
{1.5MB single image · lossless compression · size determines resolution}
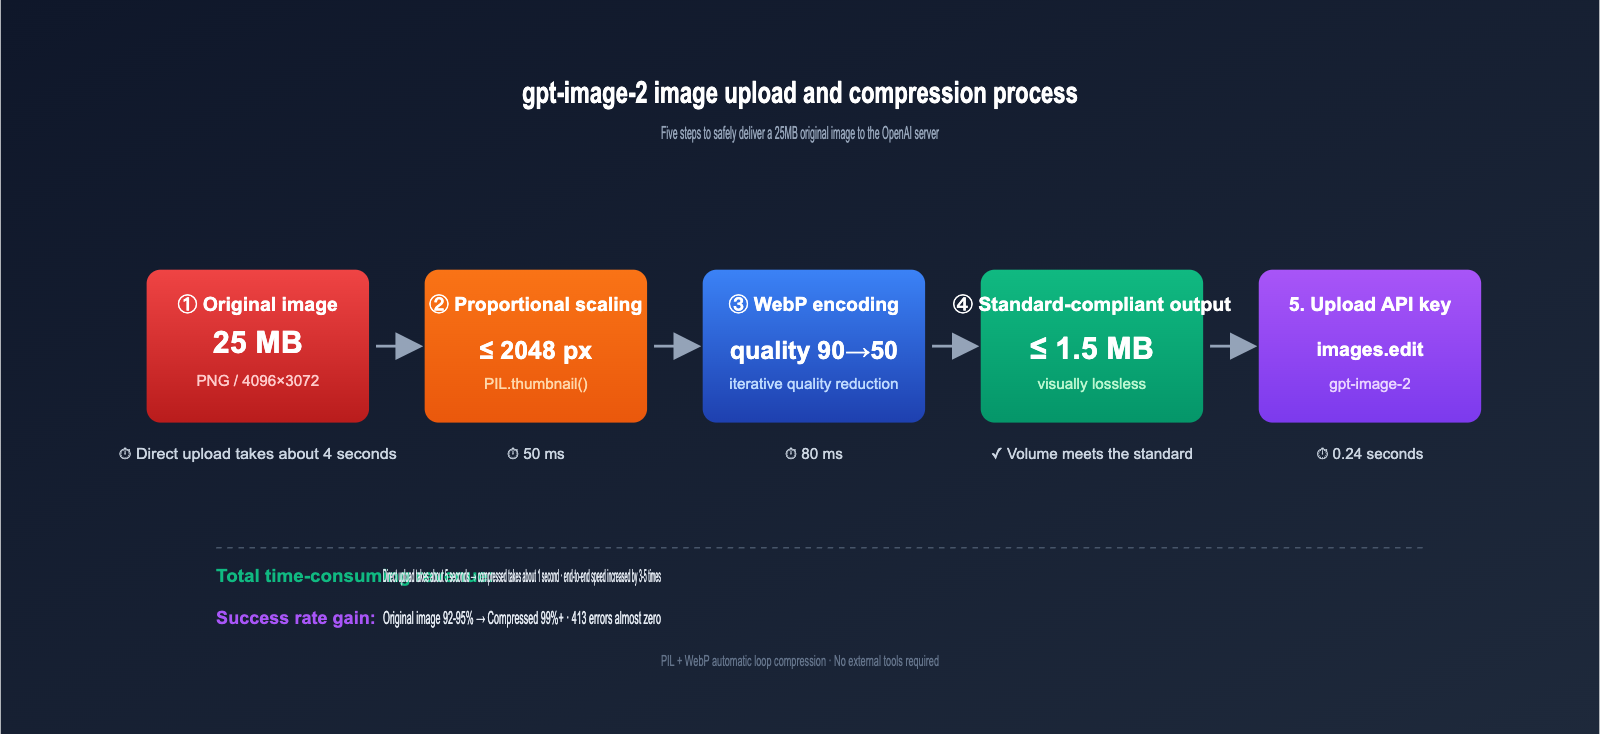
{25MB}
{Direct upload of original image}
{4096 × 3072 PNG}
{⚠ Slow transmission (4 seconds+)}
{⚠ Easy to trigger 413 error}
{⚠ Server-side decoding is slow}
{Compress}
{WebP 85%}
{1.5MB}
{2048 × 1536 WebP}
{✓ Fast transmission (0.24 seconds)}
{✓ Success rate 99%+}
{✓ Image generation speed improved}
{Treat 1.5MB as a hard constraint at the code level · WebP is superior to PNG · Do not stack 8K/4K prompts}
{OpenAI official limit 50MB · Practical dessert 1.5MB}
gpt-image-2 Image Upload Specifications: Official Limits vs. Real-World Limits
The official OpenAI documentation for gpt-image-2 image input specifications is quite lenient, and at face value, it seems there are no restrictions to worry about. But "being able to use it" and "using it well" are two different things. In practice, you must set a stricter red line for yourself.
The table below compares the official limits with the recommended real-world values, which are based on aggregated experience from many domestic developers:
| Dimension | Official Limit | Recommended | Reason for Difference |
|---|---|---|---|
| Single Image Size | 50MB | ≤ 1.5MB | Large file transfer + server-side decoding significantly increase latency |
| Images per Request | 16 | 1-4 | Stacking too many images lowers the success rate |
| Supported Formats | PNG / WEBP / JPG | WEBP / JPG (Compressed) | PNG is usually too large; WEBP offers the best performance |
| Max Resolution | 3840px | Under 2048px | Internal feature extraction still performs downsampling |
| Aspect Ratio | 1:3 ~ 3:1 | Match output ratio | Mismatched ratios trigger extra padding/cropping |
Why set the limit at 1.5MB? It's the "sweet spot" that balances transmission time, decoding time, and network stability. Below 1.5MB, most home broadband connections can finish the upload in 1-2 seconds. Once you exceed 5MB, the total time for transmission and server-side decoding grows non-linearly, and you'll clearly notice the API "hanging."
💡 Practical Tip: We recommend setting 1.5MB as a hard constraint in your code, using libraries like PIL to perform automatic compression before the call. When calling gpt-image-2 via APIYI (apiyi.com), the transmission optimization for small files on domestic IDC nodes is particularly noticeable.
Why You Should Compress Single Images to Under 1.5MB
Many developers ask: "Since the official limit is 50MB, why bother compressing to 1.5MB?" There are actually four engineering-level reasons for this, and any one of them is enough to make you take image size seriously.
The first reason is transmission latency, which is the most underestimated factor. A 25MB image takes about 4 seconds of pure transmission time on a 50Mbps upload connection, while a 1.5MB version takes only 0.24 seconds. This time is added directly to the total API response time.
The second reason is the risk of 413 errors. Reports of "413 Request Entity Too Large" errors for gpt-image-1 / gpt-image-2 are quite common in the community. Even if you're under the 50MB limit, your request might be truncated by a gateway (CDN, reverse proxy, or load balancer) along the way. Compressing images to under 1.5MB effectively avoids these errors and improves call stability.
The third reason is server-side decoding time. Once the OpenAI server receives an image, it needs to decode, extract features, and perform embedding/vectorization. The time taken for these steps is positively correlated with the total number of pixels. Even if bandwidth isn't a bottleneck, large images will slow down the generation process.
The fourth reason is retry costs. If a large image call fails, you have to re-upload the entire 25MB. With a 1.5MB image, a retry is almost instantaneous, making a huge difference in overall end-to-end reliability.
Quantifying these four reasons with real test data makes the comparison clearer: uploading the same original image at 25MB, 5MB, 1.5MB, and 500KB to the gpt-image-2 editing interface, and repeating the process 50 times with the same prompt and size parameters, reveals a clear inflection point in total end-to-end time and success rate. 1.5MB is roughly the sweet spot on this curve; compressing further yields diminishing returns on the overall experience without needing to sacrifice image quality.
🔧 Optimization Tip: When calling
gpt-image-2in a production environment, I strongly recommend making "pre-upload compression" a standard step in your code rather than an optional one. By using APIYI proxy nodes for batch tasks and implementing a 1.5MB compression strategy, you can reduce the batch failure rate from 5-8% to under 1%. This difference becomes very significant when you're handling tens of thousands of calls per month.
Compression Doesn't Mean Quality Loss: A Major Misconception
There's a widespread myth among developers: "Compression = Quality Loss = Worse AI Results." This might have been true in the JPEG era of 2010, but in the age of WebP and high-quality JPEG in 2026, it's severely outdated.
The following table compares common misconceptions with the facts to help you build the right intuition for image processing:
| Common Misconception | Fact |
|---|---|
| Compression always loses quality | WebP at 85+ quality is visually indistinguishable; same for JPEG at 90+ |
| Larger images are clearer to AI | gpt-image-2 downsamples large images; pixels beyond the model's working resolution are wasted |
| PNG is best because it's lossless | PNG is usually 3-5x the size of WebP, but the model's output is nearly identical |
| Compression tools secretly change colors | Mainstream tools (Squoosh / TinyPNG / Sharp) preserve color ICC profiles |
| No need to compress if the prompt is strong | Prompts and image size are independent; compression only affects transmission, not understanding |
Regarding tool selection, you can choose a solution based on your use case:
| Tool | Use Case | Advantage |
|---|---|---|
| PIL / Pillow | Python backend batch processing | Simple code integration, can loop to adjust quality until target is met |
| Sharp (Node.js) | Node.js backend | Best performance, handles dozens of images per second on a single core |
| Squoosh | Frontend single-image compression | Browser-based WASM, compresses without server uploads |
| TinyPNG | Manual batch processing for designers | Smart palette reduction, visually lossless |
| System Screenshot Tools | macOS / Windows | Simply select JPEG 80% to meet requirements |
Thinking of "compression" as a "necessary pre-processing step" rather than a "compromise that hurts results" is the psychological foundation for using image APIs effectively.
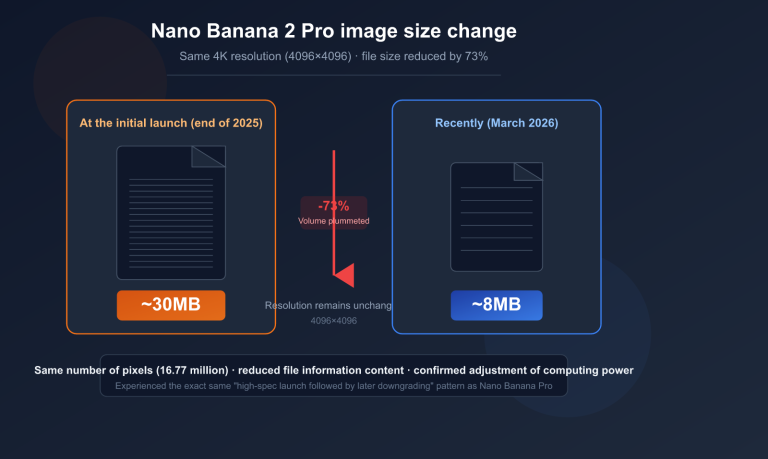
One final point to clarify: gpt-image-2 performs internal downsampling on very large images; its actual "internal working resolution" is far lower than the maximum upload limit. This means if you feed it a 4000×3000 pixel image, it might only see a 1024×1024 downsampled version. The extra pixels you uploaded were discarded by the model from the start—a completely wasted bandwidth expense.
Once you understand this, the fact that "results are nearly identical before and after compression" is no longer just an intuition, but a conclusion based on clear technical evidence. Compressing images to the 1024-2048 range hits the model's working resolution perfectly—it's neither wasteful nor detrimental.
gpt-image-2 Output Resolution: The size Parameter is the Only Switch
If "lossless compression" is a common misconception on the upload side, then "writing 8K in your prompt gets you 8K" is the biggest myth on the output side. In this section, we'll clear up exactly how the output resolution of gpt-image-2 is determined.
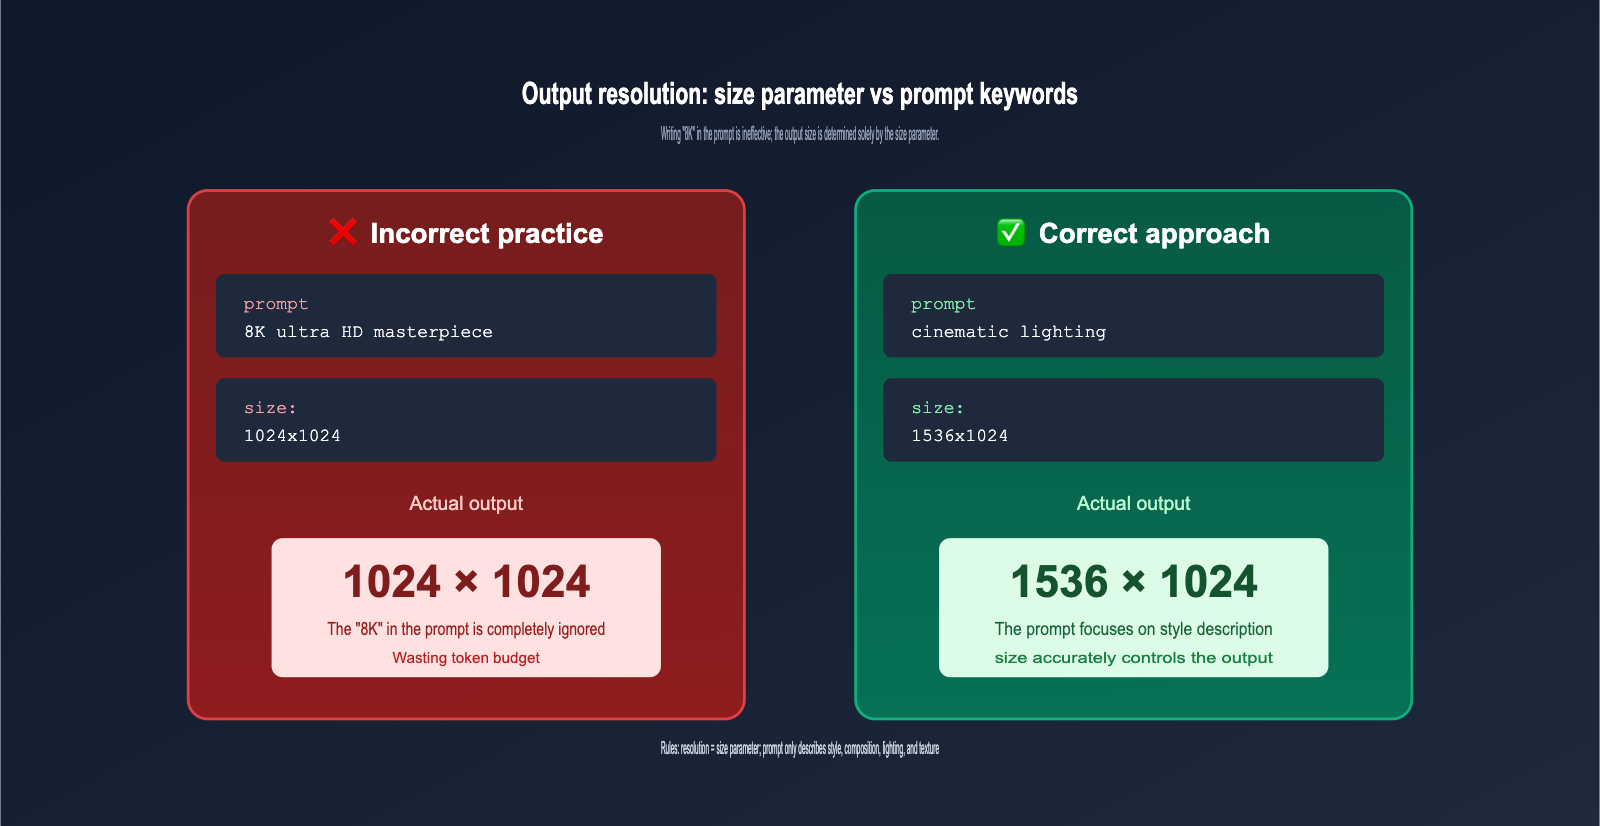
The only parameter that affects output resolution is size; nothing else works. This is a critical but widely misunderstood rule. I've put together a comparison experiment to help you build some intuition:
| API Configuration | Actual Output Resolution |
|---|---|
size="1024x1024" + prompt without "4K/8K" |
1024×1024 |
size="1024x1024" + prompt with "8K resolution" |
Still 1024×1024 |
size="1024x1024" + prompt with "ultra HD 4K" |
Still 1024×1024 |
size="1536x1024" + prompt with "low resolution" |
1536×1024 (size takes priority) |
size="3840x2160" + any prompt |
3840×2160 (Experimental) |
The conclusion is clear: Stuffing your prompt with resolution keywords like "8K", "4K", "ultra HD", or "HQ" won't make your output image larger or sharper; it just wastes tokens and eats into your prompt budget.
So, what values does the size parameter actually support? gpt-image-2 is much more flexible than its predecessor, supporting both presets and custom dimensions:
| Configuration | Range | Notes |
|---|---|---|
| Standard Presets | 1024×1024 / 1536×1024 / 1024×1536 | Most stable, recommended for daily use |
| Custom (Standard) | Width/Height must be multiples of 16 | e.g., 1280×720, 1600×900 |
| Custom (Large) | Max side length 3840px | Anything over 2560×1440 is experimental |
| Aspect Ratio | Between 1:3 and 3:1 | Extreme ratios are not supported |
| Total Pixels | 655,360 ~ 8,294,400 | Has both lower and upper bounds |
Save those "resolution description" words for more valuable content in your prompt, such as style ("oil painting style"), composition ("low angle shot"), lighting ("golden hour lighting"), or texture ("matte ceramic surface"). These are the elements that actually influence the final output quality.
Here's another counter-intuitive but important detail: Choosing a larger size doesn't necessarily mean a more detailed image. When you select an experimental high resolution like 3840×2160, the model is actually performing super-resolution sampling after an internal low-resolution generation. The detail density doesn't linearly increase with pixel count, and you might even see a drop in consistency due to the longer generation time. For daily workflows, the "sweet spot" is 1024×1024 or 1536×1024—they're fast, detailed, and the most cost-effective.
📌 Prompt Cleaning Tip: Before calling gpt-image-2, remove all ineffective keywords like "8K", "4K", "ultra HD", and "high resolution" from your prompts to make room for truly useful descriptions. We recommend comparing the same set of prompts with different
sizeparameters on the apiyi.com platform to help you build an intuition for the relationship between resolution and image density.
gpt-image-2 Practical Implementation: Complete Python Code for Compression and Upload
Theory aside, let's get to the code. The following Python snippet implements a complete workflow: "automatically compress to under 1.5MB → call the gpt-image-2 edit API → save the output." You can copy and paste this directly into your project.
import io
import base64
from PIL import Image
from openai import OpenAI

# Call via APIYI proxy, no overseas network required
client = OpenAI(
    base_url="https://vip.apiyi.com/v1",
    api_key="Your APIYI Key"
)

def compress_image(input_path: str, target_kb: int = 1500) -> bytes:
    """Automatically compress images to under a target KB, prioritizing WebP format"""
    img = Image.open(input_path).convert("RGB")

    # Limit max side to 2048, scale proportionally if exceeded
    if max(img.size) > 2048:
        img.thumbnail((2048, 2048), Image.LANCZOS)

    # Start from quality 90, decrease by 5 until target is met
    quality = 90
    while quality >= 50:
        buf = io.BytesIO()
        img.save(buf, format="WEBP", quality=quality)
        if len(buf.getvalue()) <= target_kb * 1024:
            return buf.getvalue()
        quality -= 5

    # Fallback: lowest quality
    buf = io.BytesIO()
    img.save(buf, format="WEBP", quality=50)
    return buf.getvalue()

# Call gpt-image-2 edit API
image_bytes = compress_image("./input.png", target_kb=1500)

result = client.images.edit(
    model="gpt-image-2",
    image=("input.webp", image_bytes, "image/webp"),
    prompt="Change this photo to a cyberpunk style, neon lights, rainy night street scene",
    size="1536x1024",       # Output resolution is determined here
    output_format="webp",   # Output format
    output_compression=85   # Output compression level 0-100
)

# Save output
output_b64 = result.data[0].b64_json
with open("./output.webp", "wb") as f:
    f.write(base64.b64decode(output_b64))
There are a few key points in this code worth noting. First, the compress_image function uses a "quality reduction loop" strategy, starting from 90 and decreasing by 5 until the file size is within limits. This maximizes image quality while staying within the size constraints.
Second, the output_compression=85 parameter only applies to WebP/JPEG output formats and controls the compression level of the returned image (default is 100, meaning no compression). If you need to display the generated image directly on a webpage, setting this to 80-90 provides a great balance between visual quality and loading speed.
Third, the size="1536x1024" line is what truly dictates the output resolution—no matter what you write in your prompt, the output image will be 1536×1024.
🚀 Integration Tip: gpt-image-2 is compatible with the native OpenAI SDK. You only need to change the
base_urlandapi_keyin the code above to run it on the APIYI (apiyi.com) platform. The platform provides specialized network optimizations for image-based APIs, significantly reducing the probability of timeouts and 413 errors.
gpt-image-2 Image Upload FAQ
Q1: Is it better to upload PNG or WebP?
WebP files are 1/3 to 1/5 the size of PNGs at the same quality level, and since gpt-image-2 decodes them to virtually identical results, WebP is the way to go. Unless your image requires an alpha channel for transparency (like a logo cutout), there’s no real reason to use PNG.
Q2: How many reference images can I upload at once?
The official limit is 16, but in practice, the success rate drops significantly once you exceed 4 images, and the model's focus on the reference images gets diluted. We recommend sticking to 1 main reference image and 1-2 style reference images; adding more often leads to a confused output style.
Q3: If I include "8K" in my prompt, does that mean I don't need to compress the image?
"8K" in a prompt is an ineffective keyword. It won't make the output 8K (that's determined by the size parameter), and it won't make gpt-image-2 skip its internal compression. We suggest using the apiyi.com console to compare the actual output of the same image before and after compression—you'll find the visual difference is almost impossible to distinguish.
Q4: What is the maximum output resolution supported by the model?
The size parameter supports up to 3840×2160, but anything beyond 2560×1440 is officially labeled as "experimental," meaning stability and consistency may decrease. For daily production environments, we recommend capping it at 1536×1024 for the best balance of speed and reliability.
Q5: Can I adjust specific areas of the image after uploading?
Yes, you can use the mask parameter to specify a mask image of the same dimensions. The model will only generate new content in the transparent areas of the mask, leaving the rest of the image as is. This is a powerful feature of the gpt-image-2 editing interface, perfect for inpainting and outfit changes.
Q6: What should I do if my gpt-image-2 calls fail frequently in China?
Direct connections to OpenAI often suffer from timeouts or SSL handshake failures in China, especially with image-based interfaces, as the larger payloads are more prone to interruption than text-based ones. By switching the base_url to an API proxy service like apiyi.com—which uses domestic IDC deployment—and combining it with a 1.5MB compression strategy, you can keep your overall success rate above 99%.
Q7: Is there really no visible quality loss after compression? Can it be over-compressed?
With WebP quality at 85+ or JPEG at 90+, there is no visual difference for natural images (people, landscapes, products). However, for scenes with dense text (posters, PPT screenshots) or sharp lines (technical drawings, pixel art), we recommend bumping the quality to 92-95 or just sticking with PNG to avoid slight ringing artifacts around text edges. The Python compression function provided in this article sets the starting point at 90, which works reliably for most scenarios.
Q8: What are the differences in upload strategies between gpt-image-2 and gpt-image-1.5?
The overall strategy is the same: the 1.5MB limit per image, preference for WebP, and size determining the output apply to both models. The main difference is that gpt-image-2 supports custom resolutions (constrained to multiples of 16) and experimental high resolutions, whereas gpt-image-1.5 is limited to a few fixed presets. If you're migrating, you can safely reuse your existing compression code.
Summary
Returning to the two core questions from the beginning of the article, the answers should now be very clear.
Question 1: What is the ideal image upload size for gpt-image-2? While the official limit is 50MB, in practice, please set a hard limit of 1.5MB. This is the "sweet spot" that balances transmission latency, 413 error risks, decoding time, and retry costs. Modern compression algorithms result in almost no quality loss, so there's no need to be obsessed with uploading original files.
Question 2: What determines the output resolution? The only answer is the size parameter, not the prompt. Please remove resolution descriptors like "8K," "4K," or "ultra HD" from your prompt templates entirely, and save that valuable token budget for useful descriptions of style, composition, and lighting.
If you commit these two rules to muscle memory, your gpt-image-2 invocation speed and success rate will improve significantly. We recommend starting with the Python compression code provided here, verifying your setup via the apiyi.com interface, and spending a day or two finding your optimal parameter combination.
📌 Author: APIYI Team — Focused on the engineering practices of OpenAI / Anthropic / Google multimodal APIs. For more advanced gpt-image-2 usage and prompt templates, visit the apiyi.com documentation center.